Showing posts with label heer. Show all posts

Monday, 26 June 2017

DAK Panzer Company - Complete.

Afrika Korps on the move.
Today I show off my newly finished Panzer III Company.

The Army Assembled

HQ - 2 Panzer III short 5cms and an objective
When I go about building a new army, I normally go about collecting units and then assemble several lists. This time around, I created a 100 point, v4 list from the Afrika Korps book and went about building just those units. Despite having to wait for some boxes to come back into stock, the army came together quite quickly.

Panzer III Short 5cm
As I pulled the figures out and laid them out for the obligatory photo shoot, I realised that the 5 units are actually built from 4 different brand models. They seem to fit pretty well together though.

Marders
The 100 point army list again is:

Panzer III Company

HQ
2 x Panzer III short 5cm

Combat Platoons
4 x Panzer III Short 5cm
3 x Panzer III 7.5cm
4 x Panzer IV Short 7.5cm
3 x Panzer II

Support Platoons
4 x Marder

Panzer IIs

Panzer III 7.5cm
Panzer IV Short 7,5cm
I also painted up a pair of 8-rads which are not actually part of this list.

8-Rads

I hope you enjoyed this project as much as I. Now to get them on the table!!

Wednesday, 31 May 2017

Review: Battlefront Jagdtiger (GBX70)

Today I review a big cat

History:
The Jagdtiger or Panzerjager Tiger Ausf. B was built from a modified Tiger 2 chassis. This monster was the heaviest production WW2 vehicle. Less than 100 of these were ever produced from 1944 till the end of the war.


The shell of the 128mm gun were so large they were in 2 parts and required 2 loaders in the AFV. However the extreme weight of the vehicle meant it was plagued with mechanical problems and breakdowns. The guns size meant it needed to be locked to mounting brackets for movement. These needed to be unlocked before the gun could be fired.


For first hand accounts of the Jagdtiger, I can recommend Otto Carius' Tigers in the mud.

Review:
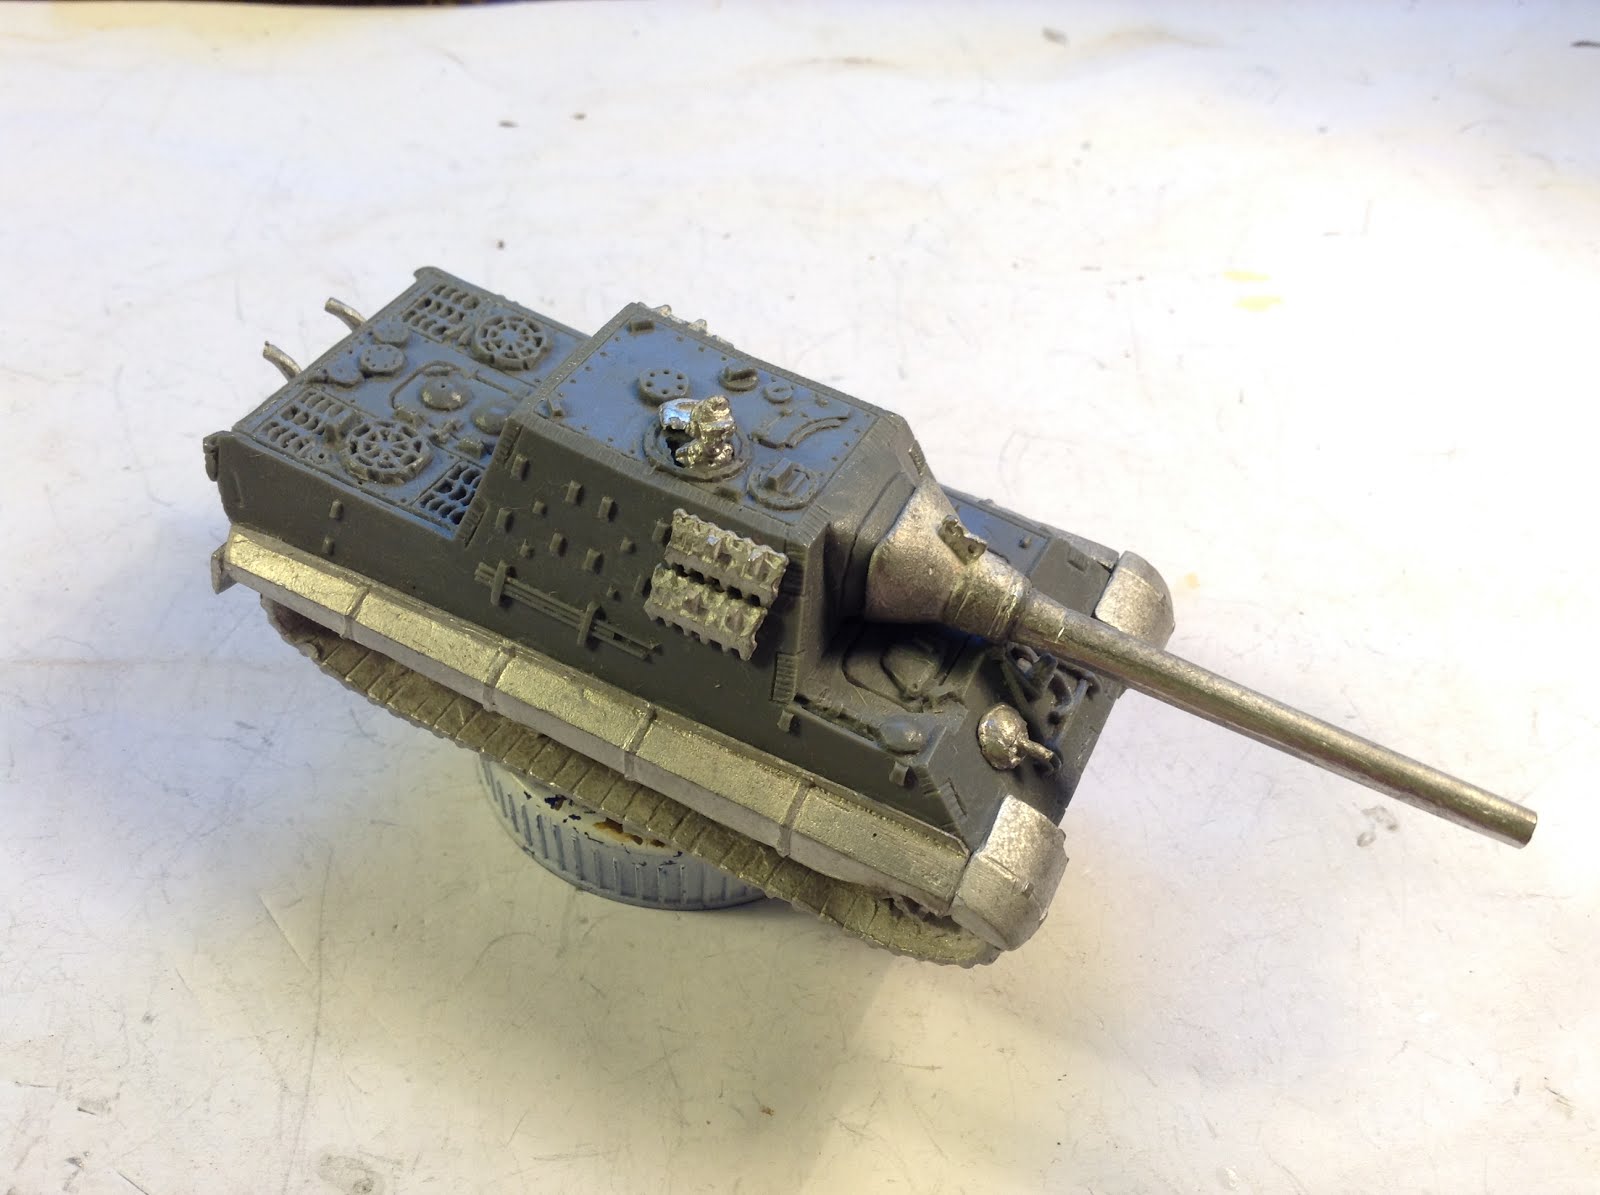
Battlefront's Jagdtiger is supplied in a box and not a blister. I think this is largely down to the size of the model itself. Aside from the model, the box also contains a decal sheet.

Box art (photo from www.flamesofwar.com)

The Jagdtiger model is an old school resin and metal kit. This is not a complex model but there is approximately 25 pieces, so it is not simple either. Expect to be gluing lots of small fiddly pieces (exhausts, MGs and mudguards).  A nice aspect of this kit is that it comes with both normal and warn mudguards. You can choose an combination of these. Similarly, the kit comes with lots of spare track that can be applied to the side of the vehicle. You can find instructions on the FOW website.


Overall, my model went together well and I had no real issues. As a warning, be careful with the side fenders. There is not alot for the glue to bond with. You may want to slightly score the surfaces to help with the glue do its thing.


Unlike something like a panzer III or panzer IV, I are unlikely to need many of these. It was therefore nice to just be able to assemble a single model. And what a model! The Jagdtiger is one of the iconic big cats and I really enjoyed putting this together as a change of pace.


Next up to work on painting it up.


I hope you enjoyed this review.


Sunday, 14 May 2017

Painting: Axis and Allies Panzer IV Short 75

A while back I reviewed the Axis and Allies Panzer IV short 75s. In summary, I have had these on the shelf for many years. They are basic models, are the right scale and fully assembled. They are not going to win any beauty pageants but they will allow me to see if the unit fits into the plan for my new list. You can find my full review here.


History:

The Panzer IV was one of the mainstays of the German forces in WW2 with over 8500 being built. It was the only tank to remain in production right through the war. The short barrel versions A - F1 were designed as infantry support tanks. The short 75mm gun was equipped for both HE and AT rounds. The F1 was the last short barrel model.


It became apparent that the Panzer III, originally designed as a anti-tank platform, was no longer viable in this role when it's gun could not be upgraded due to the small size of the turret. The Panzer IV F2 was built around a long barrel 75mm gun and the Panzer III was discontinued.


Painting:
I followed my normal scheme and process for these tanks. You can see more detail about these in my earlier PZIII posts. Being that these are only going to be a trial, I didn't add any stowage. The Axis and Allies models don't easy allow open hatches so I will need to mark the commanders vehicle once I get to the decal stage. I will do this with the whole company at the end of the project.


Until then, I hope you enjoyed this article.


Friday, 7 April 2017

Painting: Battlefront Oberst Rettemeier in Panzer IIIJ (GE886)

Today Oberst Rettemeier's Panzer IIIJ rolls off the production line.


For those 3 people following my blog, you will remember I reviewed this lovely character model here.

I have had lots of fun painting up this vehicle. Here are the steps I took (all Vajello except where noted):

Oops - some careless green on the hull.

  1. Spray white undercoat.
  2. Iraqi Sand base coat.
  3. I used a variety of colours on the stowage - Green Gray for the sandbags, Khaki for the canvas, Luftwaffe Camo Green for the barrel, German Camo Brown for the boxes.
  4. Rettemeier himself is Russian Uniform.
  5. I then washed the whole tank with Army Painter Strong Tone.
  6. I then went back over the Iraqi sand leaving the nooks and crannies.
  7. The stowage and Rettemeier's uniform was then highlighted the relevant base colour with a touch of Iraqi sand.
  8. The road wheels and bucket are black gray. 
  9. I then gave the tracks and road wheels a light dry brush with Iraqi sand


So, my commander in chief is painted. Back to the rest of my panzer IIIs and IVs. I hope you enjoyed this article.


Saturday, 15 October 2016

Tournament Coverage: Waffenbruder 2016 Newcastle

An exciting doubles event is being held in Newcastle this weekend at the Gallipoli Club in Hamilton.

Each pair takes a 1800 point list from Grey Wolf and a 1800 point list from Red Bear. Each player plays on their own table against an opponent list from the other book.

10 brave warriors are competing.

Sadly I couldn't make it but a Hasty Attack corespondent has shared some photos of day ones action. Hope you enjoy.
David and James.
Assault across the river.
Panzer Angriff
Soviet Armour Blunted.
I cannot work out which way this photo should be!


Wednesday, 5 October 2016

Semovente 105/25 or the Small World of Toy Tanks.

Story:
At MOAB one of the key draw cards is The Bring and Buy stand. This is where players consign lots of unwanted figures to the organizers who sell these on the owners behalf for a 10% cut.

I stopped by and picked up four nicely painted Semovente 105/25. I have been looking for these models for a while as I have wanted to use them in some of the Late War Italian lists.

Taking my spoils back to the FOW area, I showed them to one of the painters of the group, Ben. Ben quickly informed me that he had actually painted them years earlier as a commission job.

The world of toy tanks and man dollies is indeed small!

History:
The Semovente 105/25 is an Italian built self-propelled gun. 12 were built and saw service under the Italian flag in 1943. After the Italian surrender, the Germans captured these units and built a further 91 vehicles. These vehicles then saw service in Italy and the Balkans.

Looking at photos of the vehicles in WW2, the Semovente 105/25 had a distinctive camouflage scheme different to the models I picked up. Oh well, they look pretty.

Pictures:

And onto the eye candy…


Thursday, 29 September 2016

Panzer IIN Platoon Finished!

In my previous post, I converted some Panzer IIIs. I still need to paint them to be ready for the weekend. Here is the step by step process I went through.

First up white undercoat. In the past, I used a black undercoat but a friend suggested that white means the base colour will be more vibrant. I don't know why but it works. This is a plastic soldier matt white.

Next up some Dunkelgelb or dark yellow. This is from the army painter spray can.

Next up a wash all over with army painter strong tone. This is from the dropper bottle and is applied with a brush

I then paint all the raised areas in middlestone (this is a perfect match for the earlier spray). I am careful to leave all the crevices that had been hit with the wash.

Next some camo. I used reflective green and chocolate brown. First I mix the camo colour 50/50 with the middlestone and water it down. I then paint within the lines just the raw camo colour. This is something I picked up from the battlefront website. This is only the 2nd time I have tried this technique.
I then painted the tracks cavalry brown. This represents the German factory primer.

Nearly there now.
Next I add some flat earth to show battlefield dust and dirt on tracks, wheels and mudguards.
Then a quick light highlight of Iraqi sand to catch the edges.
Finally some decals and a spray of matt varnish.
Here is the unit on patrol.


Monday, 26 September 2016

German Machine Gun Platoon.

 The MG 42 or Hitlers Buzzsaw was the mainstay of the German forces in WW2. The gun could fire an amazing 1200 rounds per minute (RPM), a much faster rate than contemporary machine guns. To overcome heating issues associated with this high rate of fire, the barrels were designed to be quickly replaced on a regular basis. The gun was used on a bi pod as a light machine gun and on a tripod as a medium machine gun. The weapon was reliable and used from 1942 to the end of the war. Some 750,000 were believed to be produced.

I am painting up a platoon of tripod mounted or Heavy Machine Guns (HMGs in FOW).


This blister has been sitting in my lead pile for an age. It is one of the "must have" units for any self respecting German commander. Time to get it out of the blister and onto the painting table.

It is code GE704 from Battle front. The blister contains 4 HMG teams and a commander. I am not painting the command team for the moment as i will likely use them as combat attachments to infantry platoons (zugs).

The sculps are excellent and mine were largely without flash. The gun itself comes fully assembled. Each stand comes with 3 crew. The loader and firer are standard. I have swoped out some of the  crew from my spares box for added variety. Assembly time was mere minutes. Here they are undercoated and with flesh painted.


Next uniforms and helmets painted and basing started.


And fully painted.