Showing posts with label review. Show all posts

Wednesday, 29 November 2017

Battlefront Valentine II.

I have painted a fair amount recently and most of it has been for larger projects or tournaments. So over the weekend, looking for a change, I went through the lead pile to look for something I wanted to paint. A single Valentine II seemed a good place to start.


Review:
I wasn’t sure what to expect from this model having not seen one before. It is a classic metal and resin jobbie but unlike most resin and metal models, this one had a recess in the hull for a turret magnet. I assume this means it isn’t an old a model. Given this is a MW period model and likely to appear in future books for this period, I expect the model may be about to be phased out and replaced and replaced with a plastic model. As usual, this is pure speculation on my behalf and I am not privy to any actual real information.


Opening up the blister, there is a resin hull piece, 2 metal track pieces, a resin turret, a metal gun barrel, a hatch, a commander and 2 pieces of turret stowage. First impressions were that the model was well detailed and captured the distinctive shape of the tank and the small, 2 pound turret.


Dry fitting the pieces together however showed me I had some work ahead of me before I could start painting. Like many of the Battlefront models, the sides of the resin hull had grooves moulded in to allow the tab on the track piece to fit in. One side is longer than the other to ensure that you don’t stick the tracks on the wrong sides. My track tabs were wider than the corresponding hull grooves meaning that the pieces wouldn’t go together. This is not uncommon with these blisters. I simply shortened the tabs on both track pieces so they fit in the grooves.


Dry fitting the pieces again, they still didn’t align correctly. My tracks were slightly bent. This was again easily fixed by just flexing the 2 ends over my hobby knife. Fitting them again, showed that there was another problem, the hull piece was warped. This was a bigger problem. I won’t bore you with details, but I spent about another 15 minutes filing, scraping and bending the 3 pieces until I got a reasonable fit. There was still a gap on one side but at least the pieces were together.


After the super glued dried and the model was sitting on the bench, I noticed that it actually wasn’t level. One track was angled back. I flicked the track back off, scraped back he glue, reglued and instead of holding the model in my hands whilst the glue dried, I pushed the model onto my bench and forced the track and the tank to sit level as the glue dried. Phew, I was glad when that was over. I could not imagine working on a company of those.


The hatch was sliced down the join with the hobby knife and glued in the open position. I popped the commander in the top. Please don't look too closely at the commander in the unpainted photos.  I may have accidentally glued in a Soviet commander that was sitting on the table and then replaced it with the correct one prior to painting.


Despite the effort involved in getting the tracks on, I am not sorry I put the model together. It is a really attractive model and looks the business. I think if BF do make this in plastic and it isn’t so hard to put together, it will be a great model. I particularly like the large skirts and the deep detail.


Painting:
This was a joy. The experience of painting a single tank is much nicer than painting up a unit or more. Having just finished up 10 Crusaders where each colour could take an hour to apply, I basically painted up most of this model in a single short sitting (whilst I was also working on other bits and pieces during drying time).


After my now standard white undercoat, I hit the model with VJ Khaki. I applied 2 light coats trying to make sure I got into every nook and cranny – and there are many. I then painted on Army Painter Strong Tone. I then brushed on a highlight of VJ Khaki. This was a bit time consuming as there are lots of separate surfaces on the engine deck and skirts especially.


Next up was the commander who received the same treatment except with Iraqi sand. The exhaust was painted cavalry Brown with a highlight of red leather. Even though this looks much different to how it would have historically, I like the stark contrast on a model that is otherwise beige. Tools were painted VJ Chocolate Brown with a VJ Flat Earth highlight. Tracks were a simple black with a VJ Iraqi Sand highlight.


Overall, I think the model looks good painted up. Yes, assembly was difficult and you can still see that the tracks don't align properly but overall, I like the model and it was the perfect tonic to a case of painting overload. Could the model be improved? Yes again. I think this would be a good case for the plastic treatment.


And here is the model in the wild. 


I hope you enjoyed this review.


Saturday, 23 September 2017

Review: Battlefront Lorraine Schlepper

Today I schlep a new unit for my DAK force.

Box Art
History:
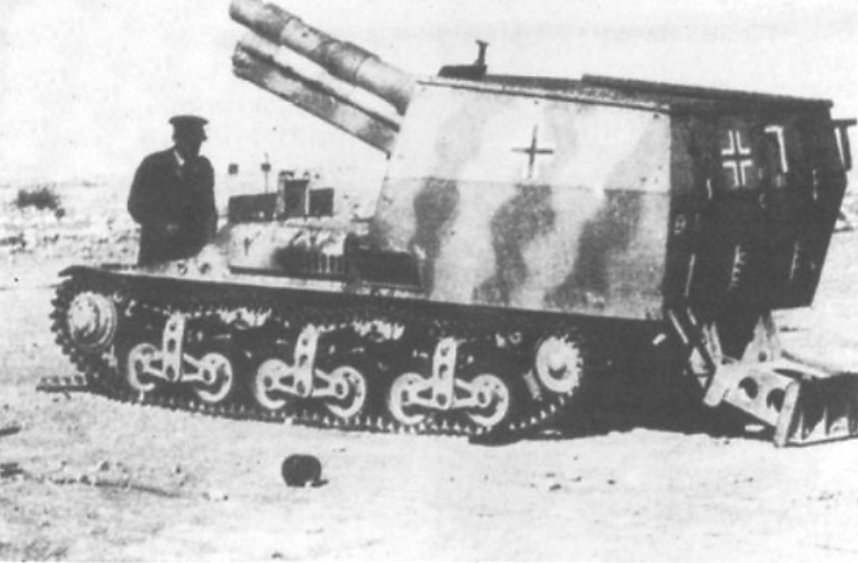
The Lorraine Schlepper was created in 1942 as a self propelled heavy artillery support for the Afrika Korp. The chassis was from a Lorraine Carrier, captured from France in 1940. The Carriers were converted to accept the 15cm sFH 13. The superstructure was made in German but installed on the vehicle in France before being shipped to Africa in 1942. The vehicle provided much needed artillery support that could keep up with the mobile Afrika Korp.

Schlepper in North Africa

Due to the weight balance and recall from the 15cm gun, the vehicle was fitted with a distinctive spade at the back. This spade was retractable and was lowered when the Schlepper was fired to prevent it from moving backwards.


Captured Schleppers (background) in a British depot

The Schleppers first saw battle on 30th August 1942 with the 15th Panzer Division. Three were lost in this action. The remainder of the vehicles were lost and captured at El Alamein.

Back of the box
Review:
This is one of the new v4 box sets that accompanied the release of the new German list book. These new unit box sets now seem to be the standard for Battlefront. Rather than releasing individual blisters, Battlefront have packaged up enough vehicles for the whole unit and added the new v4 cards. I really like this new packaging. Gone are the days of needing to hunt up enough blisters for a unit.

Cards
The box contains 4 Lorraine Schleppers, 2 of the new plastic crew frames and 2 unit cards - a Schlepper card and a Panzer II observer card. Sadly no decals.

Parts arrayed.
The Schleppers themselves are resin and metal. I believe these are the old sculpts previously seen in the old blisters. These models went together well enough but needed a bit of cleanup. Each model is made up of a resin body, 2 metal tracks, a metal 15cm gun and the rear trail. The contact points for the spade is very small. I scored both contact points of the chassis and the trail in order to provide the best possible bond. The gun mounting points needed to be slightly bent in order to fit correctly on the vehicle.

Assembled
The crew are new. They are the new soft plastic range from battlefront. Whilst I like the move to plastic, I think there is a little room for improvement here. The face lack some of the detail we have come to expect from the old battlefront metal models. I hope that Battlefront will continue to work on these plastic models and end up with a product as good as the old metal figures.

Forward Hans.
Painting:
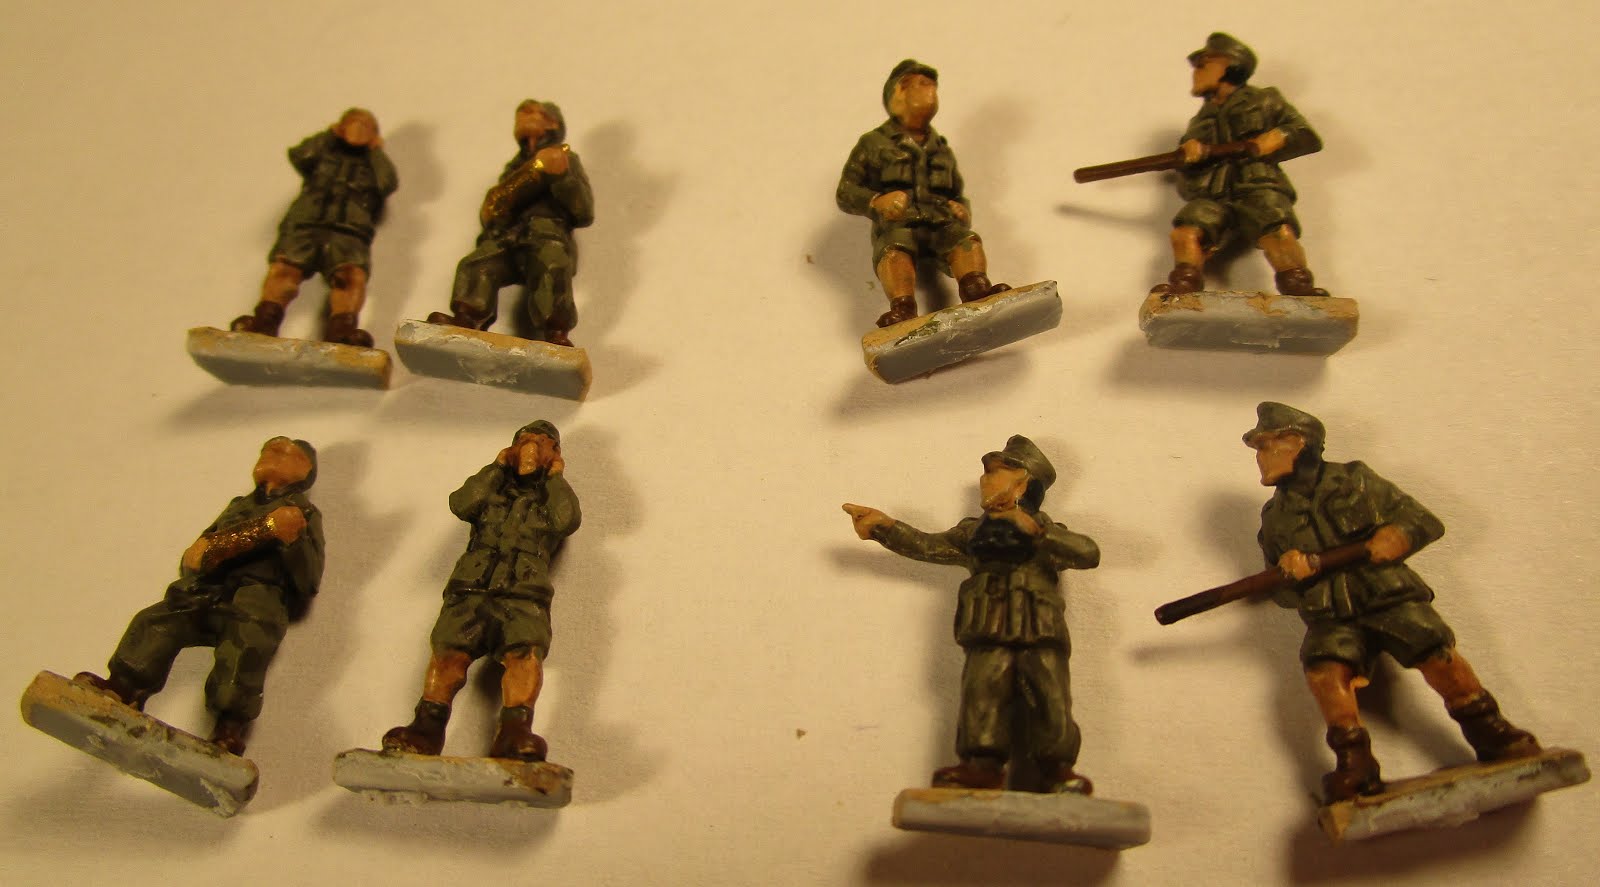
I followed my standard Afrika Korp scheme for this unit. I painted the crew separately. This is a departure from my normal process. I normally paint the crew after sticking them in. Separately worked much better. Despite some of the feedback I have seen from others, I had no problem with paint adherence to the plastic figures. They accepted paint and a wash really well.

Crew Painted

With my painting area still a work in progress after moving house, I haven't yet located my box of decals. Rather than delay this review, I have snapped the photos without decals. I will apply some once I manage to locate them.


Conclusion:
Overall I like this box, the real positive is that it contains a whole unit worth of models complete with cards. It would have been nice for some decals to be included but these can be sourced from the standard DAK decal pack. I also think the plastic crew is the way forward. However I think these crew will benefit from some more development from Battlefront. I look forward to building some more v4 box sets.


I hope you enjoyed this review!


Thursday, 13 July 2017

Review: Battlefront Staghound (BR350)


I add to my LW British force with the iconic Staghound.

History:
The T17E1 or as the British named it, the Staghound was a US designed and produced armoured car. After producing some 250 units, the US decided that the vehicle wasn't suitable. The British army were able to use the vehicle and did to good effect.


The armoured car was a 4 x 4 with twin, rear mounted V6 engines that provided good speed and maneuverability. The car was armed with a 37mm gun and 2 machine guns, one mounted in the hull and the other co-axially.


Aside from the near 3000 Stag hounds produced, there was 1000 AA variants that sported twin 50 cal machine guns. The Staghound III mounted a Crusader turret with the 6 pound gun.


Review:
The Battlefront blister provides the pieces to make either a standard Staghound I or the AA model. I chose to build mine as Staghound Is. This is an older resin and metal model. The hull and turret are both resin. The metal parts are 4 wheels, a 37mm gun, a commander, 2 hatches and an optional AA machine gun.


Assembly was simple. A couple of the wheels needed to be trimmed slightly to fit into the slots on the hull. The hatches also needed a slight trim to fit neatly in the turret. All normal, minor cleanup. Overall, it all went very well.


Unusually, I didn't notice the rough texture of the hull until after the undercoat was on. It is visible but doesn't look too bad.


Unit:
I plan to run these as part of a 2nd Household Cavalry army.


I hope you enjoyed this review.

Sunday, 28 May 2017

Review: Battlefront M10C Tank destroyer Platoon (UBX49)

Today I review the recently released Battlefront Tank Destroyer Platoon box.

Cover box art (from flamesofwar.com)

The Tank Destroyer box contains enough frames to make 4 M10s, 4 M36s or 4 M10C or any combination of the three. There are 2 frames for each vehicle packed with all the pieces needed to make the three different options. The frames also contain a few pieces of stowage - spare track, spare wheels, crates and Jerry cans. Finally, the box contains a crew frame for each vehicle with 6 figures each and a sheet of decals.

I have chosen to make mine up as the M10C. Post war, this vehicle was named the Achilles.

History:
The M10 was a US made tank destroyer, based on the chassis of the Sherman. Unlike the Sherman, the M10 had slopped and thinner armour. This lighter weight design allowed the vehicle to travel quickly. the vehicle was armed with a 3 inch gun and a 0.50 caliber machine gun.

Achilles crossing a river on a Churchill ARK
From 1943, M10s were supplied to the British. The British converted some 1100 to the more powerful 17 pound gun. The British employed both 17lb and 3 inch gun versions. The Achilles was used in a rapid deployment anti-tank role. Some Achilles were sent ashore on D-Day.

Achilles
Review:
First up, this is one of the new Battlefront plastic kits. I was initially guilty of lamenting the end of the old resin and metal box sets. However, I have changed my tune. The new plastics are great. Best of all, they keep improving. Not just the detail but the extras (stowage), versatility (3 models in one box) and the fit. Yes, there is more construction but I think the result is a better looking vehicle.

Tank Destroyer frames with crew and details at top.
The back of the box shows what bits belong to which model. This makes it very simple to work out what is required. The flames of war website contains a very simple set of assembly instructions.

The back of the box. (from flamesofwar.com)
Assembly was pretty straightforward. There are some very nice features to this kit. Firstly most of the mould lines and frame attachment areas end up unseen. BF have done a good job with this. You don't need to necessarily clean up every point, just the ones that are visible. Secondly the barrels and mantlets all have different connections. This means that you cannot attach the wrong gun to a mantlet.


My only real gripe with assembly was the 50 cal MG. The barrel is really fine and hard to clip from the frame without bending or breaking. Eventually I worked out to simply remove the frame from around the MG rather than clipping the MG out.


I think this kit is terrific for the US Tank destroyers. Sadly for the British TD, the crew are not in the kit. According to the BF article, these need to be ordered seperatly. For someone with an existing British force, you will likely have some spare crew from your spares box, however for someone starting out, you will need to buy four of these if you want to model the vehicle with crew. Likewise with decals, these are US focused. Yes, there is a common air recognition symbol but no British-specific decals. For someone looking to make an Achilles, it is still a good kit, there is simply just more work and possibly expense involved

As is the new BF standard, this box doesn't come with magnets. Instead the turret pins are modeled onto each frame. I have only just started trying these so I have yet to form an opinion on them. I will say though that they are easier to apply than the magnets.


Look out for an upcoming painting post. I hope you enjoyed this review.


Monday, 27 March 2017

Review: Battlefront Oberst Rettemeier in Panzer IIIJ (GE886)

Today I review a hero no longer available in V4.


Why is he reviewing a warrior that cannot be taken I hear you ask? Well this is one of those beautiful one-off warrior figures that are nicely designed and perfect to lead my new MW desert Panzer force.


The Oberst Rettemeier hero was available in the V2 book North Africa. He could also be used in V3. Sadly there are no warriors in V4 MW yet. I don't know if there will be down the track either. The figure is available in the on-line store. If you want to know more about the man and the model, there is also a spotlight.


Regular readers will know I reviewed the Battlefront Panzer IIIJ here. The review will provide a brief history of the Panzer III. The Panzer IIIJ in that review will be my 2ic.


So onto the review. The model comes with a resin hull and turret, 2 metal tracks, a metal barrel and command figure (Rettemeier). There are no options here. The turret box is attached, the turret hatch is opened. So, I assembled the figure as designed. Being that I want this to be my company commander and not the specific character that the model was designed for, I cut down the 5cm long to a 5cm short. I want my HQ section to be Panzer III short 5cms. The model was well cast with only a tiny bit of clean up on the metal parts. This mould clearly hasn't been spun as many times as a standard tank and therefore seems much crisper.


Unlike the standard panzer III, this model is covered in stowage. There are sand bags, tarps, jerry cans, spare track, spare road wheels, drums and crates. All this will help my 1ic to stand out from the other tanks in the army.


As I said in my previous review, don't discount the old resin and metal models. The character models especially are great for adding variety to your force.


I cannot wait to paint up this vehicle, I hope you enjoyed this review.


Friday, 24 February 2017

Treasures from the Top Drawer - Part Two - FIB Nebs

So earlier in the week, I shared my first Treasures from the Top Drawer post. Here is another.

Unit assembled.
I picked these up a while back. At the time, Battlefront were having issues with meeting supply and it seemed a good opportunity to try another manufacture's wares. I went with Forged in Battle (FIB). FIB have a good range of German, Russian, British and American WWII figures. FIB are probably most well known for the bases that are cast onto their vehicles. This has polarized the FOW community; who knew that based tanks could cause so much angst. Ironically, most Bolt Action players seem to go out of their way to base up their vehicles. I for one don't mind the bases, they serve as an additional area to decorate. Thankfully the FIB ones are smaller so don't really interrupt placement of vehicles. Bases aside, their range is good. Their website is here. Check them out!


Pretty sure the chap at the front is from BF.

The figures themselves are very nice. The crew are slightly larger than BF standard models but otherwise very well proportioned. The detail is crisp and the figures are well cast. From memory, there wasn't any major cleanup required. I suspect there is a figure or two in the mix that are BF crew. I am not sure though, it has been a while. The observer team is definitely from BF.

Crew reloading.
The smoke launchers are slightly smaller than the BF equivalent but are just as well sculpted. The trail is cast as one piece and from memory, the launcher is another separate piece. Not much assembly required. These models look great - you wouldn't be able to mix these with BF nebs in the same unit though.

Close up.
When these were relegated to the top drawer, the figures were glued to the base (which I provided from my spares box) and everything was undercoated black. I have simply painted them in my current method. I have done some work on the basing and I like the scheme. There is a mix of three different products there.

Rear shot
I hope you enjoyed the review. Stay tuned for future tales of Treasures from the Top Drawer.


View from the Cherry picker.
Side shot.