Showing posts with label 1:100. Show all posts

Sunday, 22 January 2017

Game: Team Yankee West Germans and Soviets

So for a variety of real life reasons, I haven't managed to play a game for a month. I was lucky enough to have a chance this weekend to play a game of TY. Even though I had to proxy my force, I couldn't resist taking some photos of the battlefield and my opponents Soviets.
It was a good, fun game and a opportunity to have a game whilst I paint up my army.
I hope you enjoy!


Monday, 14 November 2016

West German Tanks - Planning Colours - AKA Paints and Stuff

So I have a bunch of new TY West Germans. Normally when I start a new army, I look up the paint chart, see what I have already and usually buy a new pot or find something similar from my existing collection. I occasionally vary slightly from the suggested colours following my own research.

So with the new colours of war paint range being listed in the painting guides, I need to rethink my approach. I have listed below what I have ended up with as I am too lazy to write it down as a method to help you in planning your new West German force.

So a new army in a new rule set gives me a whole new opportunity to try some new techniques. I will be incorporating some new ideas into my plan below.

First up, WHAT to paint:

The Germans used standard camouflage patterns, meaning all the vehicles of the same type had the same pattern. Battlefront have also published some camouflage templates here.  

Next the paints. I came across a Vajello to colours of war chart on the FOW site here. Sadly this must have been published before leopard so wont be 100% useful.

I will start with my new white spray undercoat. This has helped to brighten my models after I switched from the old black undercoat.

I then came across a cool post from SonBae on WWPD who clearly went through a similar process to me. In the article he finds replacements for the 3 main tank colours. I will shamelessly steal these suggestions. I had 2 of these already and picked up the 3rd from my local store.

Nato Green - 71-022 Camouflage Green.
Worn Rubber - 862 Black Gray
Woodland Brown - 72-043 Beastly Brown.

Other colours needed will be the light highlight of Iraqi sand in place of dry dust. I will use flat earth for weathering on the tracks and road wheels. I normally use this colour for spade handles too. I will use my ancient GW bolt gun metal with black poured into the bottle for any metal on the models.

For the new, I will be using a gloss spray and then Tamiya Panel line after I finish up the base coat and before a matt varnish.

It is said that no battle plan survive contact with the enemy, so lets see if this is the final plan. I will also need to develop my infantry plan too.

I hope you find this useful.


Sunday, 13 November 2016

Painting: Battlefront Romanian TAC Schneider 47mm Guns (RO510)

A while back on the blog I posted a review of Battlefronts TAC Schneider 47mm guns. The review can be seen here.

Well, they are now painted up. Here are the 6 gun teams. My initial EW list has 8 guns in 2 units of 4. I still need to pick up another pack to complete my lists - but that is a problem for later. Anyway, onto the pictures. These figures were a pleasure to paint up. I hope you enjoy them!

Gunline!
The tank is that way Jim.

Rear view
Side View
Guns are not glued down so I can swap for other gun options.

Friday, 11 November 2016

Team Yankee - Hall of Heroes Battle Day

Today, the Hall of Heroes store in Sydney played host to the Team Yankee battle day. This was to be a 3 player-per-side total war game to showcase the new rules. For those interested, the player pack is here.

Daddy day care meant I aimed to get there after the deployment, watch a few turns and head back. Given it was to be 37 degrees Celsius today in Sydney - that is 99 degrees Fahrenheit yanks, it seemed a good day for a gaming store visit.

I don't have an army but was offered a command when it turned out the guys were a player short. This was to be my first game of Team Yankee! I was lucky enough to run some Soviets. The game was to be 2 Soviet armies (Afgansty and Motor Rifles) against an Australian and West German force.

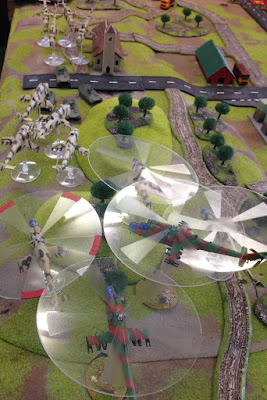
Here is the table set up for the game. It is 12 foot by 6 foot.

The 12x6 foot table with forces being assembled.
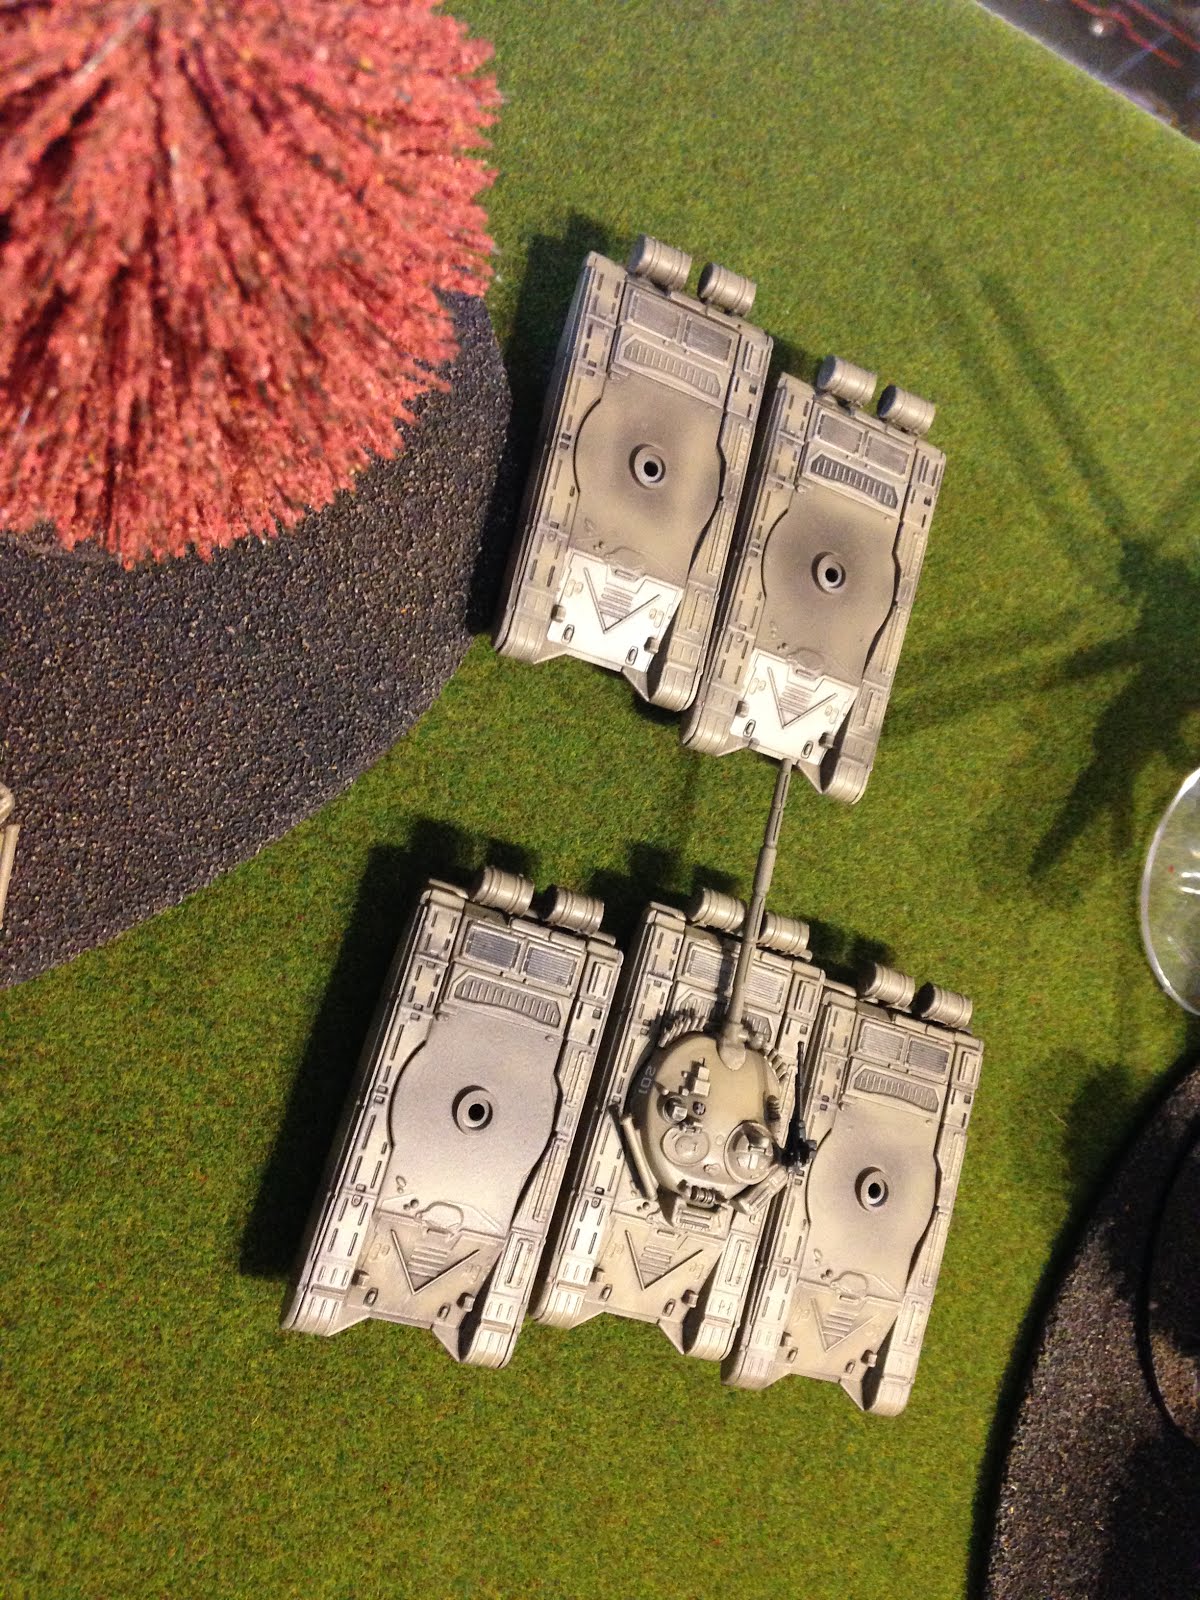
12 Hinds.
Spoilers, it is going to be a 18 Hind day! Above are the first 12 ready to fly.

Hospital.
Above is a nice hospital. A massive terrain piece that doesn't seem so big on a 12x6 foot table!

Of course, you cannot have a hospital without the inevitable overpriced hospital packing. As usual, all spots are taken.

Hospital Parking.

The road bisecting the table.

More air options.

T72s ready to roll out.

Soviet motor rifles.
I was given command of the above soviet motor rifles as part of my force. I also had 6 hinds and 2 units of T72s.

West Germans.
And with that, the game was underway.

Motor Rifles on the objective.
The soviets spearhead down the road. Well, until it was realised the scenario rules disallowed spearhead.
Spearhead!


Nicely painted soviets
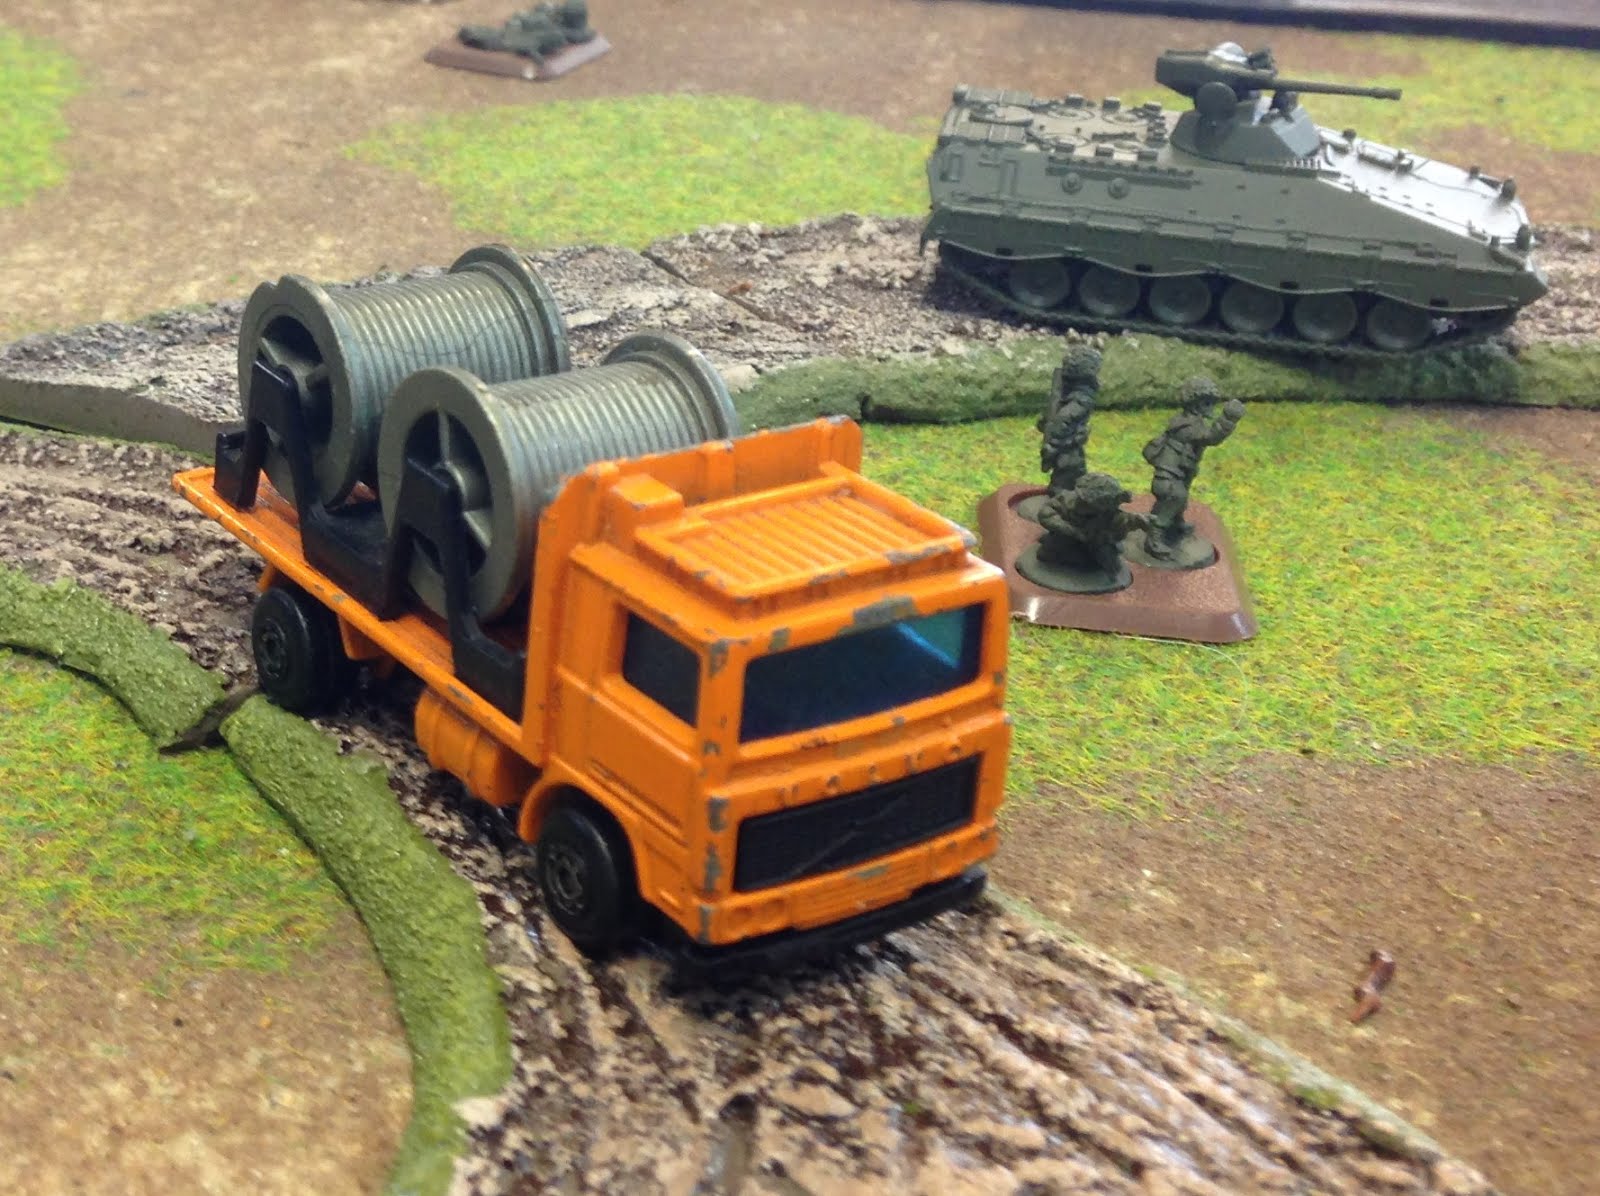
The table was scattered with vehicles and nicely constructed vignettes. Below is a truck dragging some wire or cable.

Logistics stops for no war!
In turn 2 and my first dice roll of the game, I took 2 BMP shots at some distant Leopard IIs. Result, dead Leopard. I like this game!

Boom - Brewed up Leopard II.
On the left flank, with the 12 hinds arriving from reserve, the lurking 6 hinds decided to also hit the table. The target, 4 Marders. A brave Hind was lost in the AA fire!

Flight of the Hinds.

Close up

Result -Four destroyed Marders.

Meanwhile on the right flank, The shilkas advance to take some shots on enemy choppers. However they are quickly dealt with by Leopard Is. Despite the early loss of a Leopard II, the T72 are staying in cover for the moment.

Destroyed Shilkas.
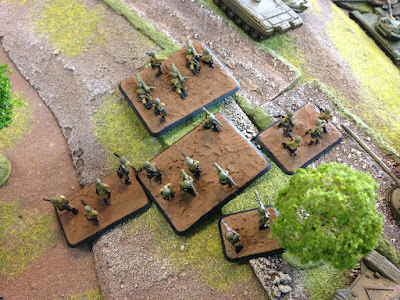
Afgansty infantry advancing in the center of the table.
With that, real life called and I had to head home. Hopefully someone will post the result of the game and I will share it here.

I enjoyed my introduction to Team Yankee. From the little I played, the game flowed smoothly, this will encourage me even more to get my force assembled. Thanks to Lachlan, Ralph, Brian, Colin and Victor for allowing me to play.

I hope you enjoyed the pictures and coverage of the game day.


Wednesday, 9 November 2016

Painting Tips 3

Here is another installment of good tips from an average painter. This time I concentrate on Flames of War specific tips.

You can see my earlier painting tips posts by clicking on links below:

Painting Tips 1
Painting Tips 2

Here are the tips I have picked up that are most useful to assembling, modelling and painting Flames of War Models.


  1. Temporarily attach tanks to a "hold". I use lids from soft drink bottles, others use old paint pots. What ever you use, blu tacing tanks and vehicles to a "hold" will allow you to pick it up, paint it without your hands actually touching the model. I apply these straight after clean up. I then leave them attached from undercoat to varnish.
  2. Score bases before gluing figures. The Battlefront bases are distinctive and look good on the table. However they are relatively smooth. I use my scalpel to scratch lines in the surface of the base in a diagonal direction. This provides something for the glue to hold onto and helps the glue to adhere the figures to the bases better.
  3. Paint your bases. Nothing looks worse on the table than a gray edge on the base that isn't painted. Whether you are using the old gray or the new brown bases, painting the edges will instantly improve the look of the base you spent so much time painting.
  4. Read up on decals. I could and might write up a post on this. Don't just apply decals to tanks and then spray varnish the model. The decal will "silver" and look dreadful. Google applying decals. There are articles and you tube videos out there to help you make decals look awesome.
  5. Try to create a vignette with every base. You want the figures to follow a theme. For example if you have an NCO gesturing and running, then try to place other figures on the move or a LMG providing covering fire. 
  6. After gluing figures to a base, use a basing material to hide the figures bases. This is less of a problem with the new brown bases but was and is a big problem for gray bases. I use filler to build up the base to the level of the figures. Others use ballast or textured basing material. Either way, you can hide the bases with one of these options.
  7. Magnets, magnets, magnets. These are not just for keeping turrets on. They can allow you to have a vehicle with different barrels or gun crews with different guns. This is only limited by your imagination and the size and variety of magnets you have.
  8. To base before or after you paint. This is subject to differing opinions. I personally base before painting but this is a compromise. There are times when this means I cannot get to every detail. However it means I can finish figures quickly and have a natural "hold" - the base. Whether you base or not, stick the figures down to something to prevent the oils in your skin touching the figures.
  9. Tanks Commanders - The best way to distinguish the command tank is to just have the platoon command vehicle with the hatch unbuttoned. Whilst it may be cooler to have all the tanks painted this way, it makes identification during gaming simple.
  10. Stowage. Stowage on tanks is a great way to improve the look of your vehicles. Look at some pics of WW2 tanks and crews had all sorts of things on the back and sides of their tanks. BF make packs of these and include them on their new plastic frames. However you can use all sorts of things like camo neting, logs to make your tanks unique. This is especially good for mono-colour vehicles like US and Soviet, green tanks.

I hope you enjoyed this post and it has inspired you to paint some of your lead pile.

Sunday, 6 November 2016

Review and Unboxing - Battlefront Leopard II (TGBX01)

I cannot resist the pull of Team Yankee any longer. I have decided to start a West German army. This is all down to the Leopard II. In 1979, the Leopard II was at the cutting edge of tank design and still in use decades later. Leaving it's effectiveness aside, the Leopard II is a great looking tank, add to this the amazing camouflage pattern of the mid 80's and this gamer is ready for a new project.

History:
The Leopard II had a problematic design process. Originally the tank was to be a US-German project. However when this fell apart, the Germans provided the approval to Krass-Maffei and MaK for 1800 Leopard IIs. The main 120mm gun was supplied by Rhenmetall. The stabilized 120mm gun fired both APFSDS-T and HEAT-MP-T rounds. 
Between 1979 and 1985, 4 batches of Leopard IIs were delivered by the 2 manufacturers. Each of these batches saw improvements and the model numbers changed with each batch.
The Leopard II was a new high watermark for tank design as this new advanced main battle tank was well armoured, well armed and highly mobile. The tank had a running weight of 55 tonnes. 

Mid 80's Leopard II. Picture from http://www.fprado.com/armorsite/leo2.htm
Review:
The Leopard 2 Panzer Zug comes with 5 Leopard 2s - all in plastic. Like always, the box shows some full painted models.


Back of the box. 

Opening the box, I find 5 sprues and a bag. The bag contains unit cards, decals and tank commanders. All seems in order so far.


Each tank is completely contained within a single frame - except for the resin commander. The good news is that there are not tonnes of tiny pieces here. This should be simple to assemble.
A single frame.

The instructions on the back of the box are very basic and will probably do the job. However given this is my first TY pack, I looked up the flames website and read the spotlight article. It has a great step by step assembly guide.

All the hull components.

All the turret components.

After breaking out the components and cleaning them up, I went ahead and put the first beasty together. It look about 5 or so minutes and I had no problems what so every.

Assembled turret

Assembled hull.

Assembled Leopard II
Another view


Overall this is a terrific model. The points where the pieces join the frame are largely then out of sight when the model goes together. A very nice design feature. All my components were dry fitted first but they are went together really well. 

The inclusion of the decals are a nice touch and will make it easy to finish these up quickly. The model comes with a turret plug which I have avoided till now. I will try these out and give them a chance. I am concerned they will snap off. Not a big deal, I guess I can always then add magnets.

This is a great model. It looks really impressive in nude gray. I cannot wait to see what it looks like with some paint on it. I will post again when I paint up these bad boys.

I hope you enjoyed my first post for my new TY force.

Friday, 4 November 2016

Review and Unboxing - Battlefront Mosque Walls (BB179)

A little while back I reviewed the Battlefront Battlefield in a Box Mosque here. The Mosque was pretty impressive alone but Battlefront have also released a box of walls to complete the set. Here is my review of the walls. At the end I also have pictures of the 2 sets together.

Review:
The box is inline with the high standard you can come to expect from Battlefront Battlefield in a box. You can see the contents on the back and a picture of the components on the cover with appropriate supporting models. My box was $32 Australian dollars. Although designed for the Arab Israeli period, it will work for WW2.

The box
Taking the plastic off and opening the box, the contents seem really well packed and secure in the foam insert. There are 4 walls, each 3.5cm high. There is also 2 gates and a Minaret. The Minaret is a match for the one supplied in the Mosque set.

The walls and Minaret in their foam protection.
The Battlefront packaging for the Battlefield in a box has come a long way. I purchased the old eastern front buildings when they were released and they came in a cardboard box without bubble wrap. Result - chipped resin. I am pleased to say that this packaging is light years ahead of the old eastern front buildings.

Contents of the box arrayed.
All of my components made it to me unscathed. Best of all the packaging looks like it will be ideal to carry and store my set. This should keep it in good condition until someone drops it at a tournament!   :)

Here are the contents assembled more coherently.
The set as seen in the picture above is probably not much use without another largish model in the middle. The walls are high (taller than a 15mm figure) and seem way to grand for anything other than a centerpiece (like the Mosque). Not a problem as such but it is not really a stand alone terrain piece.

That said, this is top notch terrain. As always with Battlefield in a box, it is fully assembled, fully painted and ready for the table. The models are nicely painted and best of all, blend in with the rest of Battlefronts desert buildings. I particularly like the battle scars in evidence on the walls. A small touch but one that really adds some realism to the terrain and makes is look like it belongs on the battlefield.

Here are some closeups of the components:

One of the gate pieces between 2 walls.

A Minaret

And, there is no point having the 2 boxes without some pictures of them together. Here is the Mosque and the Mosque Walls together.

The Mosque in all it's glory.
A close up of the front of the Mosque behind the walls.
I think combining the sets really brings the model to life. I think this will look great on my table. I am one more step closer to that MW desert table. C'mon Battlefront, where is version 4!?

I hope you enjoyed this post. I have been travelling this week and haven't had any real hobby time to paint, model or blog. However, the Hasty Attack blog has passed 5000 hits while I wasn't watching. It seems there are some people reading it. Please feel free to leave comments.