Showing posts with label west German. Show all posts

Saturday, 25 March 2017

Painting: Battlefront Roland Flak Batterie (TGBX08)

Today I test fire the Rolands for my new West Germans.


A while back I un-boxed and reviewed the Battlefront Roland box set. I also reviewed the history of these self propelled West German flak vehicles. You can find that article here.


After some real world delays, I have finally managed to get these 2 Rolands painted up.


I followed my now established paint scheme. For anyone new to this army project, you can find the refined formula here in the Luch article. Like the Gepards, I used the Soviet Green spray as a base coat. 

These vehicles haven't been varnished yet so you might see some gloss varnish around the decals. This will disappear once varnished.


I have another pair of these to paint up which will give me a unit of 4.


I hope you enjoyed my review and painting articles for these lovely models. 


Monday, 27 February 2017

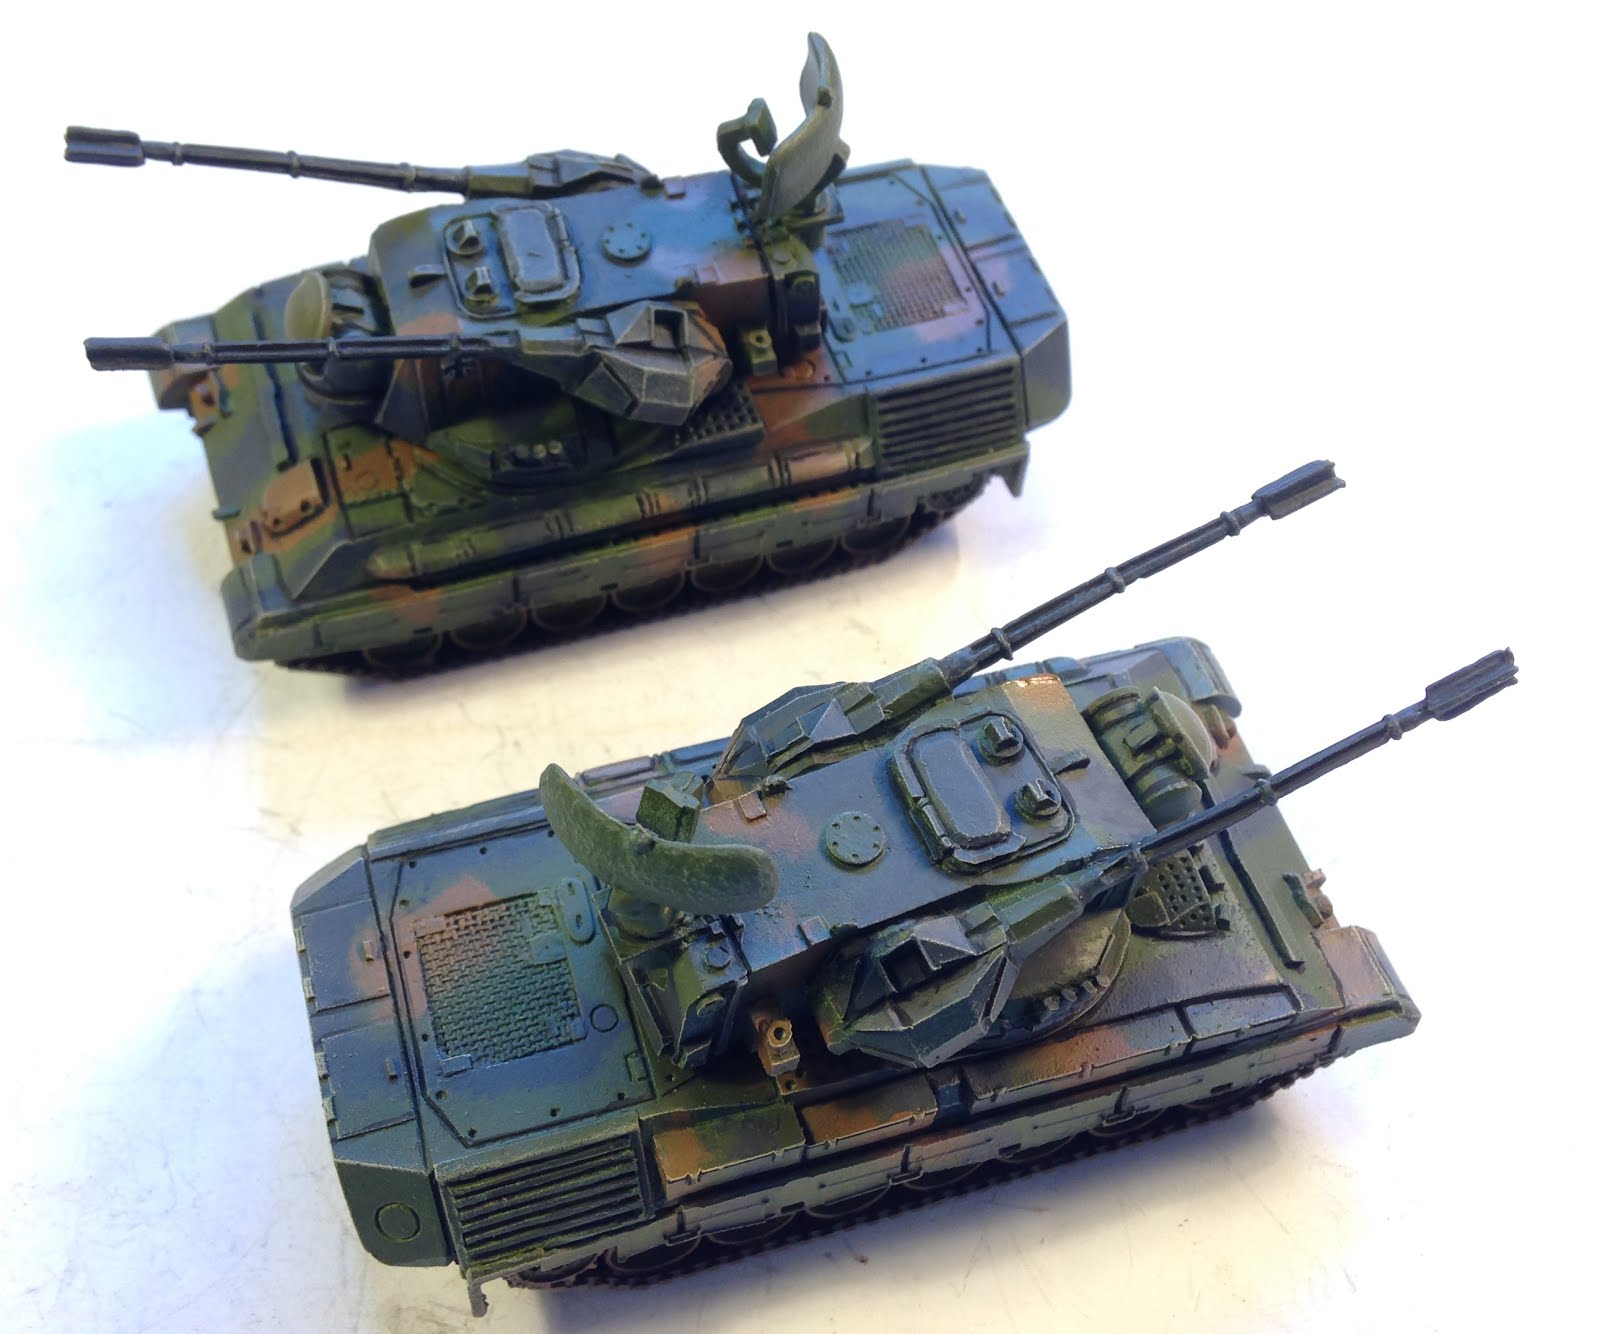
Painting: Battlefront Gepard (TGBX07)


Today on the blog, the freshly painted Gepards roll off the painting desk.


A month and a day ago, I reviewed and un-boxed the Battlefront Gepards. That post is here. We have had terrible weather in Sydney, between high heat, humidity and rainfall. I finally managed a good day for spraying a few days back. The Gepards are the first of that batch of TY West Germans to be finished. More to come!

I used the Plastic Soldier Soviet Green spray. If anyone from Plastic Soldier Company or a distributor in Australia is reading this, your spray cans are great but very hard to come by. I have checked a bunch of shops and was unable to get my hands on a can. I ended up convincing a mate to part with one of his cans that he isn't using just yet. The product is good and I for one would buy more if I could get a hold of more.


Anyway, back to the Gepards. Aside from the Soviet Green spray, I followed my now standard TY paint scheme and it worked well. I couldn't tell from the pictures what colour the radar dish should be so I left it Green. If anyone knows, please sound off in comments.


I hope you enjoyed this review.

Monday, 20 February 2017

Painting: Battlefront Luchs Spah Grupp (TGBX05)

Last week I reviewed the Battlefront Luchs Spah Grupp. The first of the 2 patrols of 2 cars is now painted up.

In order to eventually tell the 2 units apart, rather than use turret numbers - which I find hard to see from the table top, I have elected to add Jerry cans to the side of the 2 cars in the first unit. I will add different stowage to the 2nd unit.

You may recall I originally detailed my plan for painting up the vehicles in the army here. This plan didn't survive first contact with the brush and was altered when I painted up my Leopard IIs. At that point I swapped Black Grey for Panzer Gray.  For the Luchs, I have kept the Panzer Gray but used Soviet Green for the base colour. I think this is an improvement and will keep this scheme for the next unit.

This unit was a ton of fun to paint. I think my technique is improving and cannot wait to paint up the next unit. But that is a post for another day!

Onto the photos. Enjoy!:


Friday, 17 February 2017

Painting: Battlefront Fliegerfaust Grupp (TGR708)

Earlier in the week, I reviewed the Battlefront Fliegerfaust Grupp. You can find that review on this link. I have just finished painting up the blister. Given the short time it took to paint up the Panzer Grenadier Platoon, I was expecting a pretty quick turn around time on this blister.

However the reality was something else. Just the six stands contain 36 figures. The six bases are each large and therefore require extra basing. However I wont need to paint another pack so not a massive problem.

Overall, I think they turned out pretty well. Given the amount of open space on the bases, this pack would have provided a great opportunity to add some more details like walls or fences.

Roll the pictures....


Monday, 13 February 2017

Review: Battlefront Luchs Spah Grupp (TGBX05)

Today I review some more of Battlefront's West Germans. This time the long servicing Luch Armoured Car.


History:
The Luchs (Lynx) was a Mercedes-Benz developed and built armoured reconnaissance car that entered service in the Bundeswehr in 1973. There are still a number of these in service in the German army.


 4 men crew the vehicle which is fitted with a 20mm cannon and a machine gun. Not a lot has changed in armoured car equipment for the Germans since the 2nd world war. The 8 rad and the sdkfz223 was similarly equipped.


What has changed is that this car has a driver in each end so the vehicle can drive backwards in the same speed as forward by changing the active driver. The amphibious vehicle can move through water with 2 water jets and on land as an 8x8. I.E the 4 sets of wheels each turn.


 Review:

These armoured cars are huge! I cannot imagine one of these sneaking past or through and enemy line without being noticed. These are very nice looking vehicles. Just like in WW2, the cold war West Germans had the best art department.


The box contains 4 armoured cars. Each made up of a resin hull, a resin turret, commanders hatch/capola (open or closed), gun, searchlight and 8 (yes 8!) individual wheels. The pack also contains a decal sheet, commander and 2 unit cards.


Whilst the new plastic ranges are the way for Battlefield to move forward, the format isn't viable for everything. These Luchs are a excellent example of what they can do with resin and metal. Everything went together well - even the 32 wheels! Despite the high piece count, these went together in about 10 minutes each and were a pleasure to work with. These are my fifth TY box or blister and the best to date.


Of the pictures I have seen, there are a few pieces missing from the models. One of the of the most recognizable is a tow chain on the front deck. However, over all, the model is very close to the real thing.


Here are the pictures of the fully assembled vehicles. I only took pics of two. Look out in the near future for a painting post. I hope you enjoyed this review.


Friday, 10 February 2017

Review: Battlefront Fliegerfaust Gruppe (TGR708)

Today, I review the redeye teams for the West Germans.

Photo from www.designation-systems.net
The FIM-43 was a man portable Surface to Air Missile. Developed in the 1960's, it used infra red to track it's targets. The Germans named it the Fliegerfaust.

Photo from www.designation-system.net

www.wikipedia.com
Review

This pack contains 36 figures, 6 recessed bases and a unit card. The red-eye firing teams are the only new figs in this pack, the rest are a repeat from the Panzergrenadier pack. The figures are magnificent sculpts in the typical BF heroic style. For example the launchers themselves are are a little more chunky than they were in real life (see pictures) however I expect they would be too flimsy if cast to scale. ĂŤ am really enjoying the new TY West Germans. The models without exception have been lovely and relatively easy to assemble.

Pack Contents
Some of the figures had some moulding issues with the 2 halves not quite aligning. This is mainly an issue on the helmet. However given the texture on the helmet, this is not such a problem. Don't underestimate the amount of work in this pack, each of the 6 teams have six figures. That is more painting than a normal infantry platoon.

Pictures:
Queue Photos. I hope you enjoyed this review.

Close up of the rear of a stand.
Close up of the front of a stand.
Top View.


Monday, 6 February 2017

Review: Battlefront Ronald Flak Batterie (TGBX08)

Today I review another AA unit for my West Germans- The Roland.

Roland Flugabwehrraketenpanzer. Photo from www.wikipedia.com
History:
The Roland is a mobile Surface to Air Missile (SAM) platform. The missile was designed to protect high value targets like airfield. The platform was designed in a collaboration between Nord Aviation of France and Bölkow of Germany that began in the early 1960s. The planning an development was plagued with issues and delays and the Roland entered active service in the late 1970s.
The Roland Flugabwehrraketenpanzer was a modified Marder that mounted the Roland Launchers.


Photo from www.wikipedia.com

Review:
The box comes with 2 Roland AA vehicles. These are the old fashioned resin bodies and turrets with metal tracks and weapons.

Box Cover
The back of the box comes with a straightforward assembly diagram. There are 10 pieces to each vehicle. The pack also contains the unit card.
The 2 missile launchers glue to the side of the turret piece. This is fairly straightforward with some handy lugs to help align the pieces. A radar dish is then glued on top. The dish is made up of 2 parts. These are quite fiddly and require some patience to get right.

Box Assembly Instructions.
For the body of the vehicle, I attached the tracks to each side. The tracks have lugs on them to meet recesses on the side of the hull, The tracks are also labelled R and L. Like the cover photos, I chose to leave the skirts of the sides of the vehicles.

Internal Packaging.
The product was well packed and got to me in good condition. The packaging was the now standard plastic insert with lots of foam packing.

Box contents laid out.
The only slight issue I had was the amount of flash and mold lines on the metal components. A fair amount of cleanup was required. However, no big deal, the models otherwise went together well.

Pictures: 
Here are the pictures of the vehicles fully assembled. Stay tuned for my painting article.

Assembled Turret
Assembled Hull.

Vehicles without skirts.