Today I join the desert armoured recce patrol
So with the new V4 books out, I am enjoying the new V4 MW desert period and have been working on building new armies and upgrading my old ones. My US forces need recce and have previously used the old jeep and half track units. This is not an option in the Fighting First book so time to paint up some Armoured Cars.
Battlefront have released a box with 2 armoured cars and 2 jeeps. Much as I would like to pick up a box, I already have some painted jeeps and I am pretty sure I have some old blisters of M3A1 armoured cars. Looking at the Battlefront store, the new
box appears to contain identical models except it comes with the new plastic crew and a unit card. So, into the lead pile I dive...
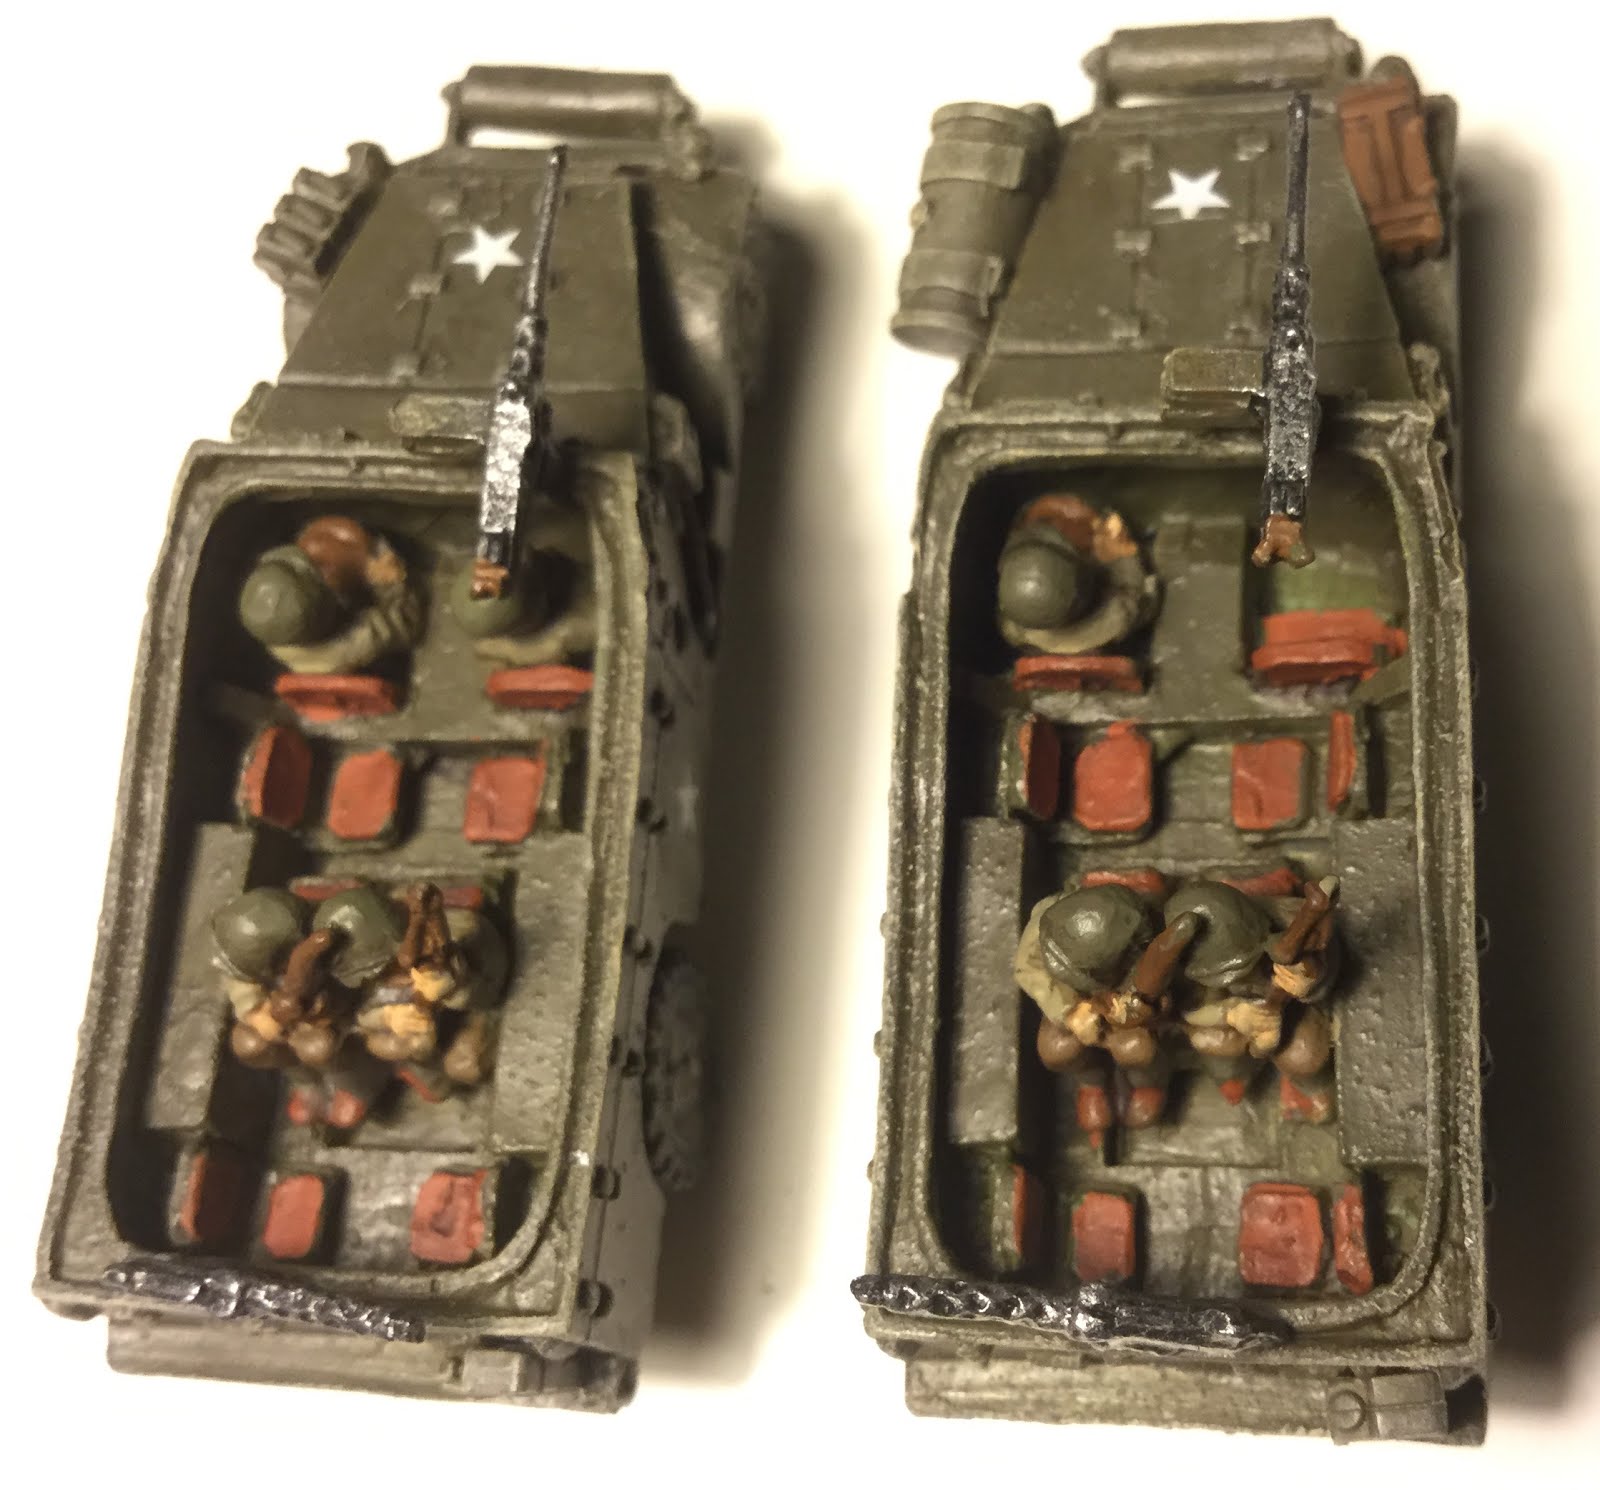
The US300 blister is an old school lead and resin model. It comes with 4 metal wheels, a metal driver, metal passengers, a 50cal, a 30cal, a front bumper and of course the resin hull. Each blister contains 1 model. I assembled 2 blisters as the unit I want is 2 armoured cars and 2 jeeps.
The pieces came with the usual mould lines and flashing. I had to cut back the nubs to get some of the wheels into the hull groves. Otherwise, a straight forward assembly. I have a history of MGs coming off USA vehicles so I only applied a 50cal and 1 30cal. I glued the 30cal with 2 contact points to try to add some strength.
The model came with no stowage so I hit up the spares box for a few pieces that I had left over from some of the new Battlefront kits. This will help to make them look less like they have just rolled off the production line.
Gluing the plastic stowage down provided a stark contrast between the newer, crisper plastic pieces and the older less defined resin and metal components. It is clear to me that the plastic models are the way forward. Leaving aside the cheaper retail prices, they are also lighter, easier to assembly and look better.
Looking back, I think it was a mistake gluing the crew into the vehicle prior to painting. It was not easy getting the brush into the small spaces to paint the crew or the inside of the vehicle for that matter either. There are bits I missed but I expect that this cannot be seem by anyone but me.
I wanted some way to tell the commander's car from the other vehicle so I glued in a plastic US Tank Commander into the passenger seat. I think this works well. It is hardly noticeable but he is a slightly different size than the metal model.
From the research I have done, the seats were covered with canvas. I have intentionally painted them red leather in order to provide some contrast. The crew are basically painted a canvas colour (Khaki) and I wanted to break this up a little.
The decals are just some left over stars from a Tank Destroyer box set. Sadly neither the original blister I used for these 2 vehicles or the new box set contains decals. I chose white stars over yellow ones in order to use them for both the desert and ETO.
Well that's all for now. I hope you enjoyed this review.


Good easy read, having built a couple of these Whites I related seamlessly to your style. Enjoy your posts 👍👏
ReplyDeleteThanks and glad you enjoyed it. The blog is a year or so old and I am still having fun
DeleteI’d use caution if wanting to use the newer models with the old. I’d got some of the new Humber Armoured cars (the box set of three) to finish’s off a project, and they are huge compared to the old models. Like 15 to 25% bigger. Can’t use them next to each other, even though they are lovely models.
ReplyDeleteGood advise, thanks. I assumed the whites and the Humber would just be old mounds in new packaging. It seems they are not
Delete