Monday 24 July 2017

Pimp my ride 2 - Battlefront Staghound AA

Rolling out of the Garage is a vehicle that Mad Mike, well, wouldn't understand.

Much as I would like to install a fish tank in the back seat or a TV in the dashboard, I have gone for a more mundane approach to the restoration of these vehicles.

The Staghound AA is one of the options from Battlefront's standard Staghound blister. I reviewed the Staghound a while back. The Battlefront Staghound is code is BR350 and is available on the website.


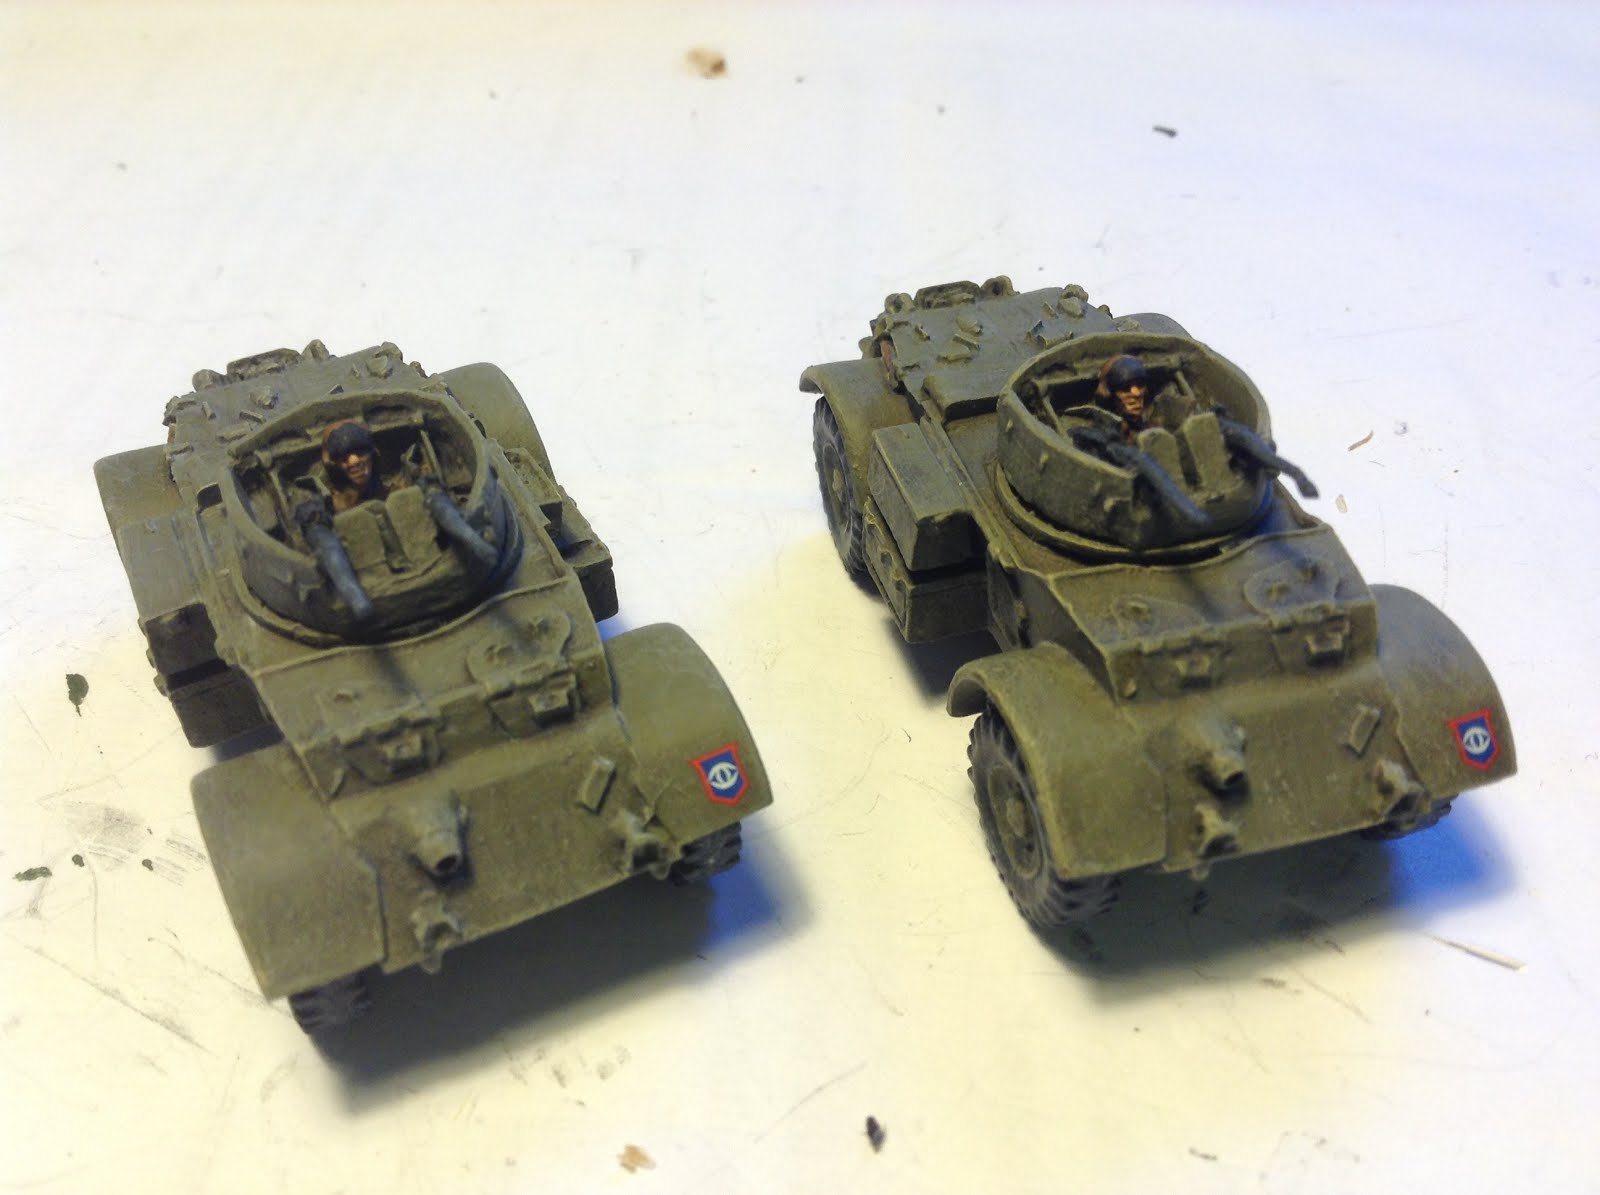
Fully pimped. Well, repainted anyway.,


Like my previous article on the AEC IIIs, these old figures needed some work. Like the AECs, these were intact but needed cleaning up. One of the turret rings was detached from the hull so the old glue was removed and the turret ring was re glued. Unfortunately, the turrets didn't rotate at all and one had to be forced in. I used a hobby knife to run around the inside of the ring and slightly increase the diameter of the hole. They now both rotate freely.

The models after cleaning up ready for painting.
The Wheels were removed, cleaned of mould lines and glued back in. This made a big difference to the stability of the vehicles. They sit level now. You can see the bare metal on the wheels of the left armoured car in the picture above.


The 50cal machine guns were very bent and were simply straightened. They didn't appear brittle so should serve without breaking for a good while yet.


These models come with a 1 piece turret cast in metal. I think they look really good, however these had some flashing and mould lines on it. These were painted over previously which made them very easy to spot. After a cleanup, I noticed there was also some very minor pitting on the back of one of the turrets but this isn't too obvious and I just left it.


I will need to work out a method of designating the commander of this platoon. I didn't consider this until after I painted them up.

These are otherwise ready to roll. I hope you enjoyed this review.


Friday 21 July 2017

Pimp my Ride - Part 1 - Battlefront AEC III


Check out whats in the garage. Time to Pimp My Ride.

A friend of mine has generously loaned me his British armoured cars. I will be using them at an upcoming competition. You will have noticed that I have recently added some Staghounds and Daimler Is to his figures. Whilst his figures do the job, they are a little tired could do with a touch up.

Fully Pimped.
I started with the AEC III heavy armoured cars. Whilst these have been assembled for years. They are available from Battlefront in the BR 342 blister. Like the rest of the British Armoured cars Battlefront make, these are very nice models.


As you can see, they have some chipped paint, some uncleaned flash and mould lines some unpainted components and are missing decals. Apologies for the crappy photos. I suspect there was some dirt on the lens of my camera.

The unit is made up of 2 AECIIIs and a Daimler Dingo.


I started the process with a brush off to remove dust from the vehicles. I then started cleaning off old flash and mould lines from the gun barrels, commander and wheels. I suspect these are really old figures as the superglue came loose from the wheels as I removed the old flash. Rather than risk any falling off later on, I removed all the wheels, cleaned up the flash and excess glue and re-glued them.


I didn't have time to strip these and start again so I pressed on with the painting. I followed my standard paint scheme. I think they are big improvement on how they looked before.


Sadly I have run out of decals but I was able to apply some Guards Armoured decals on the front and back.


I finished these up with a brush of matt varnish. I am pretty sure they hadn't been previously varnished. This should help to keep the paint on for a few years to come.


It has been fun restoring these old figures. I hope you enjoyed this post.


Monday 17 July 2017

Review: Battlefront Daimler I (BR311)


Daimler Is are scouting ahead of a hasty attack.

Earlier, I shared a review of some Staghounds. Some Daimler Is are now ready to join the force.


History:
Fitted with a 95 horse-power engine, the Daimler I was developed in line with the smaller Daimler Dingo. The armoured car was equipped with 4 wheel steering and fully independent suspension. The vehicle was crewed by 3: a driver, a gunner and a commander. The standard Daimler I was fitted with a 2 pound gun and a coaxial machine gun. To improve anti-tank penetration, some vehicles in the European Theater of Operations (ETO) were fitted with a Little-John adapter. The Little John operated with the squeeze bore principle which increased muzzle velocity by increasing barrel pressure.

Review:
This is another of the resin and metal models that really is still the standard for most Battlefront products. The kit contains a hull and turret in resin. The kit comes with a standard 2 pound or 2 pound with Little John adapter options. Each blister contains one model.


Assembly was a breeze. The hatch of the Daimler wasn't hinged but rather slid back. Therefore an unbuttoned hatch would sit flat behind the commander. I want to upgrade the commander of each of my 2 units to a Little John adapter equipped gun so I have assembled a mix of standard 2 pound guns and Little Johns.


I didn't have any real cleanup with these. There were the usual mould lines on the wheels, barrels and other metal parts. As is normal, the wheels were dry fitted and a few required adjustment to fit correctly. The only really time consuming part was hollowing out the back of the mantlets to fit on the front of the turret. The moulding process had left a little extra metal in the back. I used a hobby knife to remove enough for a good fit. No biggie.


These are really lovely models and I think BF have done a great job of capturing the wide sweeping curves of this car. Along with the Staghound, I have really enjoyed painting up my 2nd Househould Cavalry force. More to come!


Painting:
And here are the pictures of these painted up.

I hope you enjoyed this review.


Note the Little John Adapter on the commanders vehicle


Note the unusual unbuttoned hatch position
And one with the Staghounds:


Thursday 13 July 2017

Review: Battlefront Staghound (BR350)


I add to my LW British force with the iconic Staghound.

History:
The T17E1 or as the British named it, the Staghound was a US designed and produced armoured car. After producing some 250 units, the US decided that the vehicle wasn't suitable. The British army were able to use the vehicle and did to good effect.


The armoured car was a 4 x 4 with twin, rear mounted V6 engines that provided good speed and maneuverability. The car was armed with a 37mm gun and 2 machine guns, one mounted in the hull and the other co-axially.


Aside from the near 3000 Stag hounds produced, there was 1000 AA variants that sported twin 50 cal machine guns. The Staghound III mounted a Crusader turret with the 6 pound gun.


Review:
The Battlefront blister provides the pieces to make either a standard Staghound I or the AA model. I chose to build mine as Staghound Is. This is an older resin and metal model. The hull and turret are both resin. The metal parts are 4 wheels, a 37mm gun, a commander, 2 hatches and an optional AA machine gun.


Assembly was simple. A couple of the wheels needed to be trimmed slightly to fit into the slots on the hull. The hatches also needed a slight trim to fit neatly in the turret. All normal, minor cleanup. Overall, it all went very well.


Unusually, I didn't notice the rough texture of the hull until after the undercoat was on. It is visible but doesn't look too bad.


Unit:
I plan to run these as part of a 2nd Household Cavalry army.


I hope you enjoyed this review.

Saturday 8 July 2017

Review: Zvezda Lee


Today I review the recently release Lee from Zvezda. Per the standard from Zvezda, the Lee is packaged one to a box. However rather than a single frame, the box contains 2 frames with the parts for the vehicle. The frames come packaged in a plastic bag with a double sided instruction sheet. The instructions are pretty easy to follow, even if there are significantly more parts than is usual with a Zvezda model.


I clipped all the parts and removed mould lines. This is where I started to have problems. The 37mm gun is very fragile and I broke mine in half removing it from the frame.


I then starting assembling the model. I am not the best modeler in the world but after assembly, I was left with significant gaps between panels. I expect that future ones would go together better but I am not impressed by the model. The traditional strength of Zvezda models has always been low cost, low part count, straightforward models. Whilst this is at a low cost, I don't see this as a straightforward model and it is certainly not a low part-count model.


I had to raid the parts box for a gun barrel to replace the one I broke during assembly.


Overall, the level of detail is good. I think what detail there is is crisp and to the normal Zvezda standard. Like normal, the detail is simplified and not oversize in the way that Battlefront is.


I picked up this model as a trial. I expected to eventually buy 20 or so for a Russian force if this first one went well. I wont be rushing out to buy another 19 at this stage.

I hope you enjoyed this review.

Saturday 1 July 2017

Painting: Battlefront Jagdtiger (GBX70)


Today a Tiger hunts.


A change is as good as a holiday, as the saying goes. Who ever said that clearly has never had a great holiday. It is nice though to have a change of pace on the painting table and the Jagdtiger was that. After painting DAK for the last few months, I needed something different. This beasty was certainly different.


I reviewed the Jagdtiger a while back. You can find that review here.

Researching units and markings for Jagdtigers was frustrating to say the least. Details are sketchy and there are not a lot of pictures. What I could glean was that most were simply painted Dark Yellow without camouflage. To break up the colour scheme, I painted mine with a replacement barrel.


I understand the 512th Jagdtiger Battalion was said to have used X and Y prefixes for the first and second companies followed by a number. I don''t have decals with an X or a Y and I couldn't bring myself to hand paint them. In the end, I opted for a simple number. I notice that Battlefront did the same for the model they painted up.


In terms of painting, I brushed on middle stone over a matt white spray undercoat and then used a strong tone wash. There are 2 highlights of middle stone with progressively more Iraqi sand mixed in. The gun barrel is simply red leather with a wash. The red leather idea was from a painter on Facebook, much as I would like to claim it for myself. The tracks and wheels were dry brushed with flat earth.


This is a seriously heavy model. I found I had to adjust my painting style and the way I held it while I painted it. The size and weight makes it very awkward to hold and move around.


I hope you enjoyed this article.