Monday 26 June 2017

DAK Panzer Company - Complete.

Afrika Korps on the move.
Today I show off my newly finished Panzer III Company.

The Army Assembled

HQ - 2 Panzer III short 5cms and an objective
When I go about building a new army, I normally go about collecting units and then assemble several lists. This time around, I created a 100 point, v4 list from the Afrika Korps book and went about building just those units. Despite having to wait for some boxes to come back into stock, the army came together quite quickly.

Panzer III Short 5cm
As I pulled the figures out and laid them out for the obligatory photo shoot, I realised that the 5 units are actually built from 4 different brand models. They seem to fit pretty well together though.

Marders
The 100 point army list again is:

Panzer III Company

HQ
2 x Panzer III short 5cm

Combat Platoons
4 x Panzer III Short 5cm
3 x Panzer III 7.5cm
4 x Panzer IV Short 7.5cm
3 x Panzer II

Support Platoons
4 x Marder

Panzer IIs

Panzer III 7.5cm
Panzer IV Short 7,5cm
I also painted up a pair of 8-rads which are not actually part of this list.

8-Rads

I hope you enjoyed this project as much as I. Now to get them on the table!!

Sunday 25 June 2017

Painting: PSC Panzer III J Early

Today I share my PSC PZIIIs


I recently recently posted up a review of these beautiful models. I think these are my new favourite plastic kits. Check my review, but I cannot say enough good things about the PSC Panzers.


Painting was per my standard DAK style. You can find that scheme here.


When it came to painting, this kit didn't let me down. The details were crisp and easy to identify, whilst still being in a restrained, realistic style (as apposed to the exaggerated Battlefront style). The large amount of running gear, stowage, tools and equipment really allowed opportunities to pick out details.


I painted and decaled these as part of 15. Panzer Division, I. Division, 2. Company along with the rest of my DAK force.


I hope you enjoyed this post.

Friday 23 June 2017

Painting: Zvezda Panzer II

Today I share some freshly painted and decaled Panzer IIs.

I previously reviewed these awesome little models here. I was really impressed with these tanks. They are designed well and require a minimum amount of assembly and fuss. Despite the plastic on the models having a slightly glossy finish, they held paint really well. I followed my now standard paint scheme. You can find details of that here.


I have chosen to model my Panzer III DAK force as 2. Company, I Battalion,15 Panzer Division. Historically the 15th had a single turret number of their models to depict the company. In this case, the 2nd company. I have also added decals for the the DAK stylized Palm symbol. After a fair bit of research, I managed to get the company number right for the Panzer IIIs and IVs (watch this space), but the Panzer IIs wrong. They should be from 4. Company. and therefore have a 4 on the side. Bummer!


The steps I took to apply the decals were:
  1. Paint the area to have decals in Vallejo gloss varnish.
  2. Cut out the decal and soak in water.
  3. As the decal is soaking, paint the area in Vallejo decal medium
  4. Push the decal onto the model from the backing paper using an old brush
  5. Position it with the brush and when right dab with a tissue to remove excess liquid.
  6. Leave to dry for a minute or so and paint gently with decal medium


I have only used the Vallejo brand but there are others that I have seen people use that are probably as good. The key is to use the gloss varnish first to give a nice flat surface for the decal to attach to and then the decal medium to help the decal fit to the models surfaces and prevent frosting when you get to the final varnish stage.


Once the decals were done and they had dried overnight, I painted the whole models with Vallejo Matt Varnish.


I hope you enjoyed this article. Stay tuned for the Panzer IIIs.


Saturday 17 June 2017

Review: Plastic Soldier Company Panzer III J

Today I dish up the last review for my DAK tank force. You might call it is desert dessert.


My DAK tank project is gathering pace and I can see the end in sight. With the Panzer IIs underway, these Panzer IIIs will be the next and final unit I need to paint for my 100 point force. Of course, that doesn't mean I wont make changes and go looking for new models once I start playing with it!


History:
It seems a long while ago now but you can find historical information about the Panzer III in my earlier reviews here and here.

Review:
First up, I was very pleased to see not only a clear inventory page that shows you what pieces are for what models, there was a full set of instructions. This has been lacking in some of PSCs kits. This is a reasonably simple kit but clear and complete instructions remove any doubt.


This box is not new so I am not breaking new ground here. The good news is that this kit, whilst old enough to be around a while, is new enough to have one piece tracks. Having assembled 21 sets of multi-part T34 tracks, I was very happy to see the one piece tracks for the panzer IIIs.

Inventory Sheet
The box contains 5 frames. Each frame has all the parts to create either a Panzer III J, L, M, N or a flame Panzer. I need four short 5cm Panzer IIIs, so I have chosen to assemble mine as the early J model. The 5th frame will stay in the drawer until I have a need for another Panzer III. The frames are packed with barrels, mantles, and all the options required. The frames also contain schutzen and stowage.

Instructions.
 After clipping out the pieces, there was really very little cleanup required. All the pieces went together without issue and compared to some of the more complex PSC models, this one went together very easily. There are some nice features that prevent error. For example the front hull piece can only go on one way. Likewise the tracks have guides to prevent them being installed on the wrong side. Simple stuff, yes, but appreciated.


The pieces are really nicely detailed are the hull especially is covered with running gear. There is a coiled tow cable, plenty of tools, a jack, lights, tow hooks etc.


These are simply lovely models and I cannot wait to paint them! I hope you enjoyed this review.


Thursday 15 June 2017

Review: Zvezda Panzer II


As regular readers will know, I have been working on a DAK tank force for FOW V4 MW. I have so far painted up a commander, 2ic, a platoon of Panzer III short 75s, 8-rads and some Panzer IVs. I ground to a halt after my order for some Panzer IIs and Panzer IIIs was delayed. The good news is that these last 2 units have arrived and I can start work on them. So, without further ado, here is a review of the Panzer IIs.


History:
In 1934, the Panzer II was designed and entered production when delays to the proposed Panzer III and IV became known. The Panzer II was equipped with a single 20mm auto cannon and a coaxial machine gun. Far from a temporary measure, the Panzer II was the must numerous vehicle during the invasion of France. It also served in Poland, the desert and the eastern front.


By 1942, the vehicle was obsolete. New Panzer IIIs and IVs were the main stay of the German forces. The Panzer II chassis were re purposed for new designs like the Marder II. Likewise, in typical German recycling fashion, the Panzer II turrets were used for gun turrets in defensive positions.


Review:
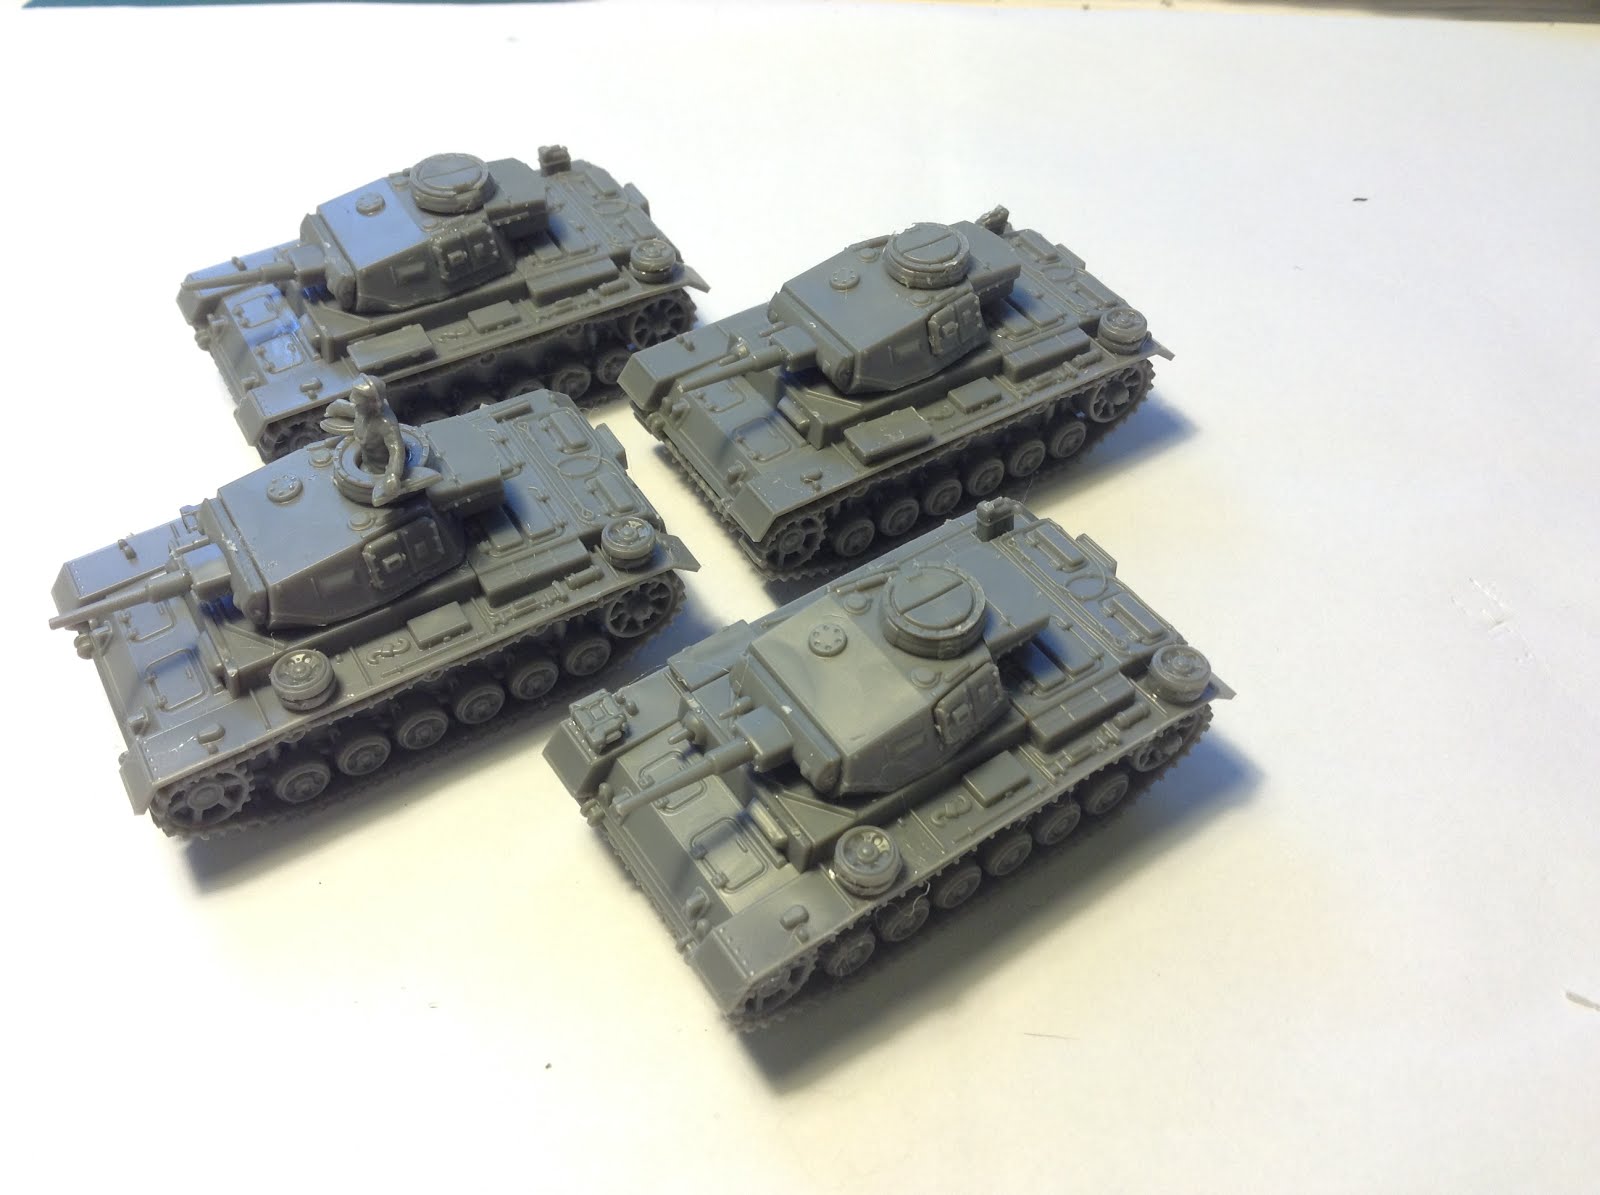
Being that I only wanted three Panzer IIs for my starting force, I went with Zvezda who sell individual models. Each box only contains a single tank.


To say this is a simple model is an understatement. There are only 5 pieces! The turret, the hull bottom, the hull top, the left track and the right track. My assembly only took a minute or two. There wasn't much in the way of cleanup and the pieces all went together well. The longest part of the process was trimming the moulding attachments from the pieces.


The model is well cast and there is a reasonable level of detail. Like all Zvezda kits, there have been come compromises made and some of the detail is very boxy. However what is modelled is clean and crisp.


Conversions:
Like all Zvezda kits, there is no flexibility. No stowage, no open hatches, no commanders. This is well known and not really an issue. I chose to add a commander and model an open hatch. I used a spare plastic soldier commander who I removed the circular base from. I then trimmed down some spare hatches from the spares box to create the 2 halves of the open hatch.


Finally, not happy with the simple clean model, I used some spare PSC stowage and added spare track, spare road wheels, crates and jerry cans. I think this will tie the models in with the rest of the army.

I hope you enjoyed this review.

Friday 9 June 2017

Treasures from the Top Drawer III: Battlefront Matilda IIs

Today I take some Queens of the Desert through their paces.


These old Matilda tanks have been sitting in my spares box for a while. A friend of mine had them sitting in his spares box before that. About time they received some attention. I don't have any Soviet Matilda IIs, so I will paint them up as Lend Lease vehicles.

Bits from the box.
Here they are in their full neglected glory. These are very old, dark resin Battlefront models. Sadly they are not in great condition. Aside from needing flash removal, some of the tracks and one of the hulls are cracked. One of the hatches seems to have been made by being filled with glue or epoxy and moulded into shape. There are 2 hatch covers missing totally. One of the barrels has been replaced by metal rod, the other is missing all together. So, some work to do!


I cut the mantlet off a metal Sherman 75mm gun sprue to make a new Matilda barrel. The small hatch was made from the casting attached to the gun. It was simply trimmed to size. The commander was from my spares box. I chose not to try and find a hatch for that as I couldn't think of a good way of doing it and figured people were unlikely to notice it was missing. Finally I cleaned up and assembled the model.


Doing some research, it seems that most but not all British Lend Lease vehicles were left in their original colours. Some were painted as they were sent for repair. I have chosen to paint mine as repaired vehicles. Given their cracks and scratch built parts, it seemed appropriate.


It has been raining solidly for a week here in Sydney so I brushed on a white undercoat rather than spraying. I then base coated the model in Soviet Green. I then washed the model in Strong Tone. I highlighted the tank with a mix of the base colour and some Iraqi Sand. I followed this up with a light edge highlight of green gray. The tracks were painted black and dry brushed flat earth. I tried something different and brushed on matt varnish. It seems to have worked well.


Not bad for old models that have been sitting unloved all this time.


I hope you enjoyed this post.


Wednesday 7 June 2017

Painting: Battlefront M10C Achilles

Today I post up some pics of my new Achilles.

I recently posted a review of the Battlefront M10 box. I chose to make mine up as Achilles. You can find that review here.


I sprayed these white and the brushed on a base coat of English Uniform. The crates and tools are base coated chocolate Brown. I then washed the entire model in Strong Tone.


I then drybrushed on a highlight of English Uniform with a touch of Iraqi Sand.  The tracks were painted black. The crates and tools were then highlighted with flat earth.


At this point I confess I didn't paint the road wheels. Please don't tell anyone! I then drybrushed the tracks and wheel flat earth. I think this covered most of the scene of the crime anyway!


Now, as I posted in the review, there were no British crew included. I scored a spare crew frame from a friend and I had 3 tank commanders left in my spares box. I could only scrounge 8 crew. I will try and source another 4 at some point. These were painted up and added in. I then added an air recognition decal.


I hope you enjoyed this review.