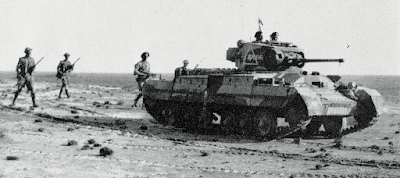
I have painted a fair amount recently and most of it has
been for larger projects or tournaments. So over the weekend, looking for a
change, I went through the lead pile to look for something I wanted to paint. A
single Valentine II seemed a good place to start.
 |
Review:
I wasn’t sure what to expect from this model having not seen one before. It is a classic metal and resin jobbie but unlike most
resin and metal models, this one had a recess in the hull for a turret magnet.
I assume this means it isn’t an old a model. Given this is a MW period model
and likely to appear in future books for this period, I expect the model may be
about to be phased out and replaced and replaced with a plastic model. As
usual, this is pure speculation on my behalf and I am not privy to any actual
real information.
Opening up the blister, there is a resin hull piece, 2 metal
track pieces, a resin turret, a metal gun barrel, a hatch, a commander and 2
pieces of turret stowage. First impressions were that the model was well
detailed and captured the distinctive shape of the tank and the small, 2 pound
turret.
 |
Dry fitting the pieces together however showed me I had some
work ahead of me before I could start painting. Like many of the Battlefront
models, the sides of the resin hull had grooves moulded in to allow the tab on
the track piece to fit in. One side is longer than the other to ensure that you
don’t stick the tracks on the wrong sides. My track tabs were wider than the corresponding
hull grooves meaning that the pieces wouldn’t go together. This is not uncommon
with these blisters. I simply shortened the tabs on both track pieces so they
fit in the grooves.
Dry fitting the pieces again, they still didn’t align
correctly. My tracks were slightly bent. This was again easily fixed by just
flexing the 2 ends over my hobby knife. Fitting them again, showed that there
was another problem, the hull piece was warped. This was a bigger problem. I won’t
bore you with details, but I spent about another 15 minutes filing, scraping
and bending the 3 pieces until I got a reasonable fit. There was still a gap on
one side but at least the pieces were together.
 |
After the super glued dried and the model was sitting on the
bench, I noticed that it actually wasn’t level. One track was angled back. I flicked
the track back off, scraped back he glue, reglued and instead of holding the
model in my hands whilst the glue dried, I pushed the model onto my bench and
forced the track and the tank to sit level as the glue dried. Phew, I was glad
when that was over. I could not imagine working on a company of those.
 |
The hatch was sliced down the join with the hobby knife and
glued in the open position. I popped the commander in the top. Please don't look too closely at the commander in the unpainted photos. I may have accidentally glued in a Soviet commander that was sitting on the table and then replaced it with the correct one prior to painting.
 |
Despite the effort involved in getting the tracks on, I am
not sorry I put the model together. It is a really attractive model and looks
the business. I think if BF do make this in plastic and it isn’t so hard to put
together, it will be a great model. I particularly like the large skirts and
the deep detail.
 |
Painting:
This was a joy. The experience of painting a single tank is
much nicer than painting up a unit or more. Having just finished up 10
Crusaders where each colour could take an hour to apply, I basically painted up
most of this model in a single short sitting (whilst I was also working on
other bits and pieces during drying time).
 |
 |
After my now standard white undercoat, I hit the model with
VJ Khaki. I applied 2 light coats trying to make sure I got into every nook and
cranny – and there are many. I then painted on Army Painter Strong Tone. I then
brushed on a highlight of VJ Khaki. This was a bit time consuming as there are
lots of separate surfaces on the engine deck and skirts especially.
 |
Next up was the commander who received the same treatment
except with Iraqi sand. The exhaust was painted cavalry Brown with a highlight
of red leather. Even though this looks much different to how it would have
historically, I like the stark contrast on a model that is otherwise beige.
Tools were painted VJ Chocolate Brown with a VJ Flat Earth highlight. Tracks
were a simple black with a VJ Iraqi Sand highlight.
 |
Overall, I think the model looks good painted up. Yes, assembly was difficult and you can still see that the tracks don't align properly but overall, I like the model and it was the perfect tonic to a case of painting overload. Could the model be improved? Yes again. I think this would be a good case for the plastic treatment.
 |
And here is the model in the wild.
 |
I hope you enjoyed this review.
No comments:
Post a Comment