Thursday, 30 November 2017

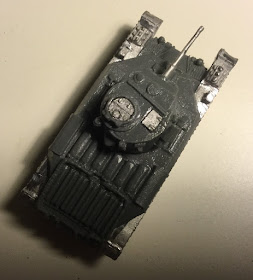
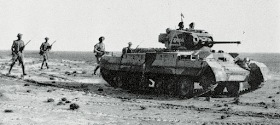
Battlefront Matilda II


So with V4 being played in my group, I am starting to make some changes to existing armies to refresh them for the new version of the rules. One of the biggest changes in V4 is the morale rules. Tank units now take a last stand test when they have less than 2 active tanks. This means for a unit of 2 tanks, a single bail or kill means a test. In V3, the unit needed more destroyed than active tanks to test. So, my unit of 2 Soviet Matildas need reinforcing with a third AFV.


My 2 Matildas were only painted up this year. Strangely enough, they were painted with V4 in mind. It goes to show that I was still working out what V4 meant when I painted up just two. That article was more of a trash to treasure post than a proper review, so here is a review.


I am not covering any new ground here. The Matilda blister has been around for a while. You will see that I painted up mine up as a Lend Lease Soviet Vehicle but given that battlefront are currently releasing MW books for V4, I expect we might see Matildas featured in a future book. This is pure speculation based on historical usage. Will we use plastic Matildas from our friends at Battlefront? I hope so.


Review:
The blister contains a resin hull, 2 metal tracks, a CS and a 2 pound gun, two hatches and commander. This is my 5th Matilda and I have not had a problem to date. Inspection of the pieces revealed no obvious issues. The distinctive tracks and sides are clean and without casting issues. The hull is nicely detailed including rivets. I particularly like that there is an option to have both turret hatches open. Finally the CS is a simple but well thought out inclusion.


 After a quick clean-up, dry fitting was a breeze and after just a few minutes, I had a fully assembled tank. Given that this is to be a 3rd tank in a unit with an existing commander, I simply glued both hatches closed. I fitted the turret with a 2 pound gun barrel.


Unlike the recent Valentine I reviewed earlier, the Matilda hull is not recessed for a magnet. Not a big issue to add one, I chose not to.


Painting:
As I am matching an existing unit, I again painted up this tank in Green. You might recall in the original article I covered that the Soviets generally didn’t repaint lend lease tanks unless they were repaired. At the time, I painted my first 2 tanks up as repaired as I had literally dragged them from the spares pile and completed my own repairs on them prior to painting. I have simply followed the same scheme on this one. After putting this one away, I noticed that I had originally used VJ German Camo. Medium Brown on the exhausts of the first two. This one had the exhaust painted VJ Cavalry Brown with a highlight of VJ Red Leather.


I will add some decals as soon as I can find them.


Conclusion:
The Matilda is one of those great models that I keep coming back to. It was used in a number of theaters (Desert, Eastern Front, and Pacific) by a number of the allies. There is also an option for Germans to run a Beute Matilda! The model is nicely detailed, easy to put together and cuts a fine figure on the table. If Battlefront bring out a plastic model, I could well see myself to buying 20 or so more to run in Late War.


I hope you enjoyed this review.


On the Prowl in a recent game.

Wednesday, 29 November 2017

Battlefront Valentine II.

I have painted a fair amount recently and most of it has been for larger projects or tournaments. So over the weekend, looking for a change, I went through the lead pile to look for something I wanted to paint. A single Valentine II seemed a good place to start.


Review:
I wasn’t sure what to expect from this model having not seen one before. It is a classic metal and resin jobbie but unlike most resin and metal models, this one had a recess in the hull for a turret magnet. I assume this means it isn’t an old a model. Given this is a MW period model and likely to appear in future books for this period, I expect the model may be about to be phased out and replaced and replaced with a plastic model. As usual, this is pure speculation on my behalf and I am not privy to any actual real information.


Opening up the blister, there is a resin hull piece, 2 metal track pieces, a resin turret, a metal gun barrel, a hatch, a commander and 2 pieces of turret stowage. First impressions were that the model was well detailed and captured the distinctive shape of the tank and the small, 2 pound turret.


Dry fitting the pieces together however showed me I had some work ahead of me before I could start painting. Like many of the Battlefront models, the sides of the resin hull had grooves moulded in to allow the tab on the track piece to fit in. One side is longer than the other to ensure that you don’t stick the tracks on the wrong sides. My track tabs were wider than the corresponding hull grooves meaning that the pieces wouldn’t go together. This is not uncommon with these blisters. I simply shortened the tabs on both track pieces so they fit in the grooves.


Dry fitting the pieces again, they still didn’t align correctly. My tracks were slightly bent. This was again easily fixed by just flexing the 2 ends over my hobby knife. Fitting them again, showed that there was another problem, the hull piece was warped. This was a bigger problem. I won’t bore you with details, but I spent about another 15 minutes filing, scraping and bending the 3 pieces until I got a reasonable fit. There was still a gap on one side but at least the pieces were together.


After the super glued dried and the model was sitting on the bench, I noticed that it actually wasn’t level. One track was angled back. I flicked the track back off, scraped back he glue, reglued and instead of holding the model in my hands whilst the glue dried, I pushed the model onto my bench and forced the track and the tank to sit level as the glue dried. Phew, I was glad when that was over. I could not imagine working on a company of those.


The hatch was sliced down the join with the hobby knife and glued in the open position. I popped the commander in the top. Please don't look too closely at the commander in the unpainted photos.  I may have accidentally glued in a Soviet commander that was sitting on the table and then replaced it with the correct one prior to painting.


Despite the effort involved in getting the tracks on, I am not sorry I put the model together. It is a really attractive model and looks the business. I think if BF do make this in plastic and it isn’t so hard to put together, it will be a great model. I particularly like the large skirts and the deep detail.


Painting:
This was a joy. The experience of painting a single tank is much nicer than painting up a unit or more. Having just finished up 10 Crusaders where each colour could take an hour to apply, I basically painted up most of this model in a single short sitting (whilst I was also working on other bits and pieces during drying time).


After my now standard white undercoat, I hit the model with VJ Khaki. I applied 2 light coats trying to make sure I got into every nook and cranny – and there are many. I then painted on Army Painter Strong Tone. I then brushed on a highlight of VJ Khaki. This was a bit time consuming as there are lots of separate surfaces on the engine deck and skirts especially.


Next up was the commander who received the same treatment except with Iraqi sand. The exhaust was painted cavalry Brown with a highlight of red leather. Even though this looks much different to how it would have historically, I like the stark contrast on a model that is otherwise beige. Tools were painted VJ Chocolate Brown with a VJ Flat Earth highlight. Tracks were a simple black with a VJ Iraqi Sand highlight.


Overall, I think the model looks good painted up. Yes, assembly was difficult and you can still see that the tracks don't align properly but overall, I like the model and it was the perfect tonic to a case of painting overload. Could the model be improved? Yes again. I think this would be a good case for the plastic treatment.


And here is the model in the wild. 


I hope you enjoyed this review.


Monday, 20 November 2017

Review: Battlefront V4 Crusaders


Today I review another of Battlefront's V4 boxsets.

Decals and Crew Frame.
Review:
The new Crusader box contains 5 tank frames, a commander frame, a sheet of decals and a set of new V4 unit cards. All this in the new V4 orange themed box. I have said it before and may mention it again in the future, I like these new plastic box sets because they contain everything needed for a unit - cards, models and decals. No more shopping around for one more blister.

Cards
Each of the frames has all the pieces to make one tank. The tank can be either a Crusader II CS, a Crusader II with a 2 pound gun or a Crusader III with a 6 pound gun. The hull is universal for all options as it the base of the turret. There is a different upper turret piece and mantlet setup for the Crusader II and III. Finally the frame contains the deck turret to turn the Crusader into a Crusader I.

One of the Crusader Frames.
As usual for these new kits, there is a smattering of stowage included. For the crusader this is a spare wheel, some cans and a tarp. Best of all, across the various new plastic kits, the stowage varies slightly allowing you to mix and match between boxes to increase variety.

Assembly:
The assembly was straightforward but was a little time consuming. I put together and painted two boxes (10 tanks) in this batch. I assembled a variety of models and it did take a few hours. As with most things, it got quicker as I moved through the process but expect to put aside an hour or two, depending on your speed, per box.

Hull Pieces

The upper and lower hull fits nicely together with nice guiding groves. I glued the tracks on next and these have 3 groves on one side and two on the other to ensure you fit them on the right side. I would have left these off for painting but the skirt fits over these and I didn't want to put this all together after painting. The skirts have a handy guiding rail on the top to slot into the upper hull pieces. Of course you could leave these off. Next up was the rear panel which is sloped at the bottom - to again avoid incorrect assembly. Finally the fuel tank sits on top. Care should be exercised here as the bonding points between the tank and the engine deck are small.

CS Turret Components.
Onto the turrets and I started off with a plan for how many of each type I wanted. I then simply clipped out just those parts I needed to make sure I ended up with the right type of turrets. I went with 2 x 2 pound turrets and 2 x CS turrets for the HQ section and then 2 x 2 pound turrets and 4 x 6 pound turrets. These 6 turrets would give me 2 full Crusader platoons.

6 Pound Turret Components.
The Crusader II turret was assembled by gluing the upper and lower turret parts together. The gun was then glued on (either CS or 2 pound) as appropriate. Finally the distinctive sliding hatch was either glued shut into the open slot or closed onto to back of the turret top. There are 2 guiding groves to ensure these are correctly located.

Assembled Crusader II turrets.
The Crusader III turret follows a slightly different model. Again the upper and lower turrets are glued together with the front piece then sliding in between. The 6 pound gun is a separate piece and fits into locating tab in the front. Finally the open or closed hatch drops into the slot.

Two platoons ready for painting.
I used turret pegs for all my tanks. For whatever reason, these are a tight fit, which I like as it means the turrets are less likely to fall out during transport.

Platoon Commander

I then glued in some tank commanders. I chose to make one of the HQ CS tanks the commander. The CS and 2 pound guns are pretty similar so I popped a commander into the other CS tank. I will be able to tell them apart from the 2 pound tanks from across the table. In the 2 platoons, I went with the 2 pound vehicles.

Finally, I applied some stowage. I used the spare wheels to distinguish between platoon. Each platoon has the wheel applied in a different spot. I used rolled up tarps and other pieces in a random fashion to create a little variety.

HQ Unit - 2 x CS and 2 x 2 Pound Turrets

Painting: 
I followed the same painting steps as the earlier 6 pound gun review. You can find that article here. The tracks on these tanks were painted German Camo Medium Brown and were then hit with a wash and a Iraqi Sand dry brush.

2 Pound Crusader II

Historically, not all Crusaders had camouflage. However most I see on the table are painted that way. I chose to paint mine without camo so that mine looked slightly different from other armies in my area.
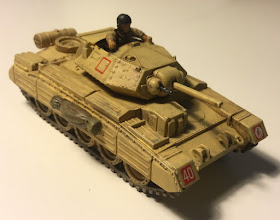
CS Crusader II

Decals:
Up to this point it was all going really well. It was at the decal stage that it went downhill. After painting on the gloss varnish to the areas to be decaled, I cut out the necessary decals for the first 5 tanks. These were soaked per the normal process and then - disaster.


6 Pound armed Crusader III

Each time I moved a soaked decal off the backing paper gently with my brush, it would split. Often in 3 or 4 places. Initially I thought I may have been too heavy handed but even the slightest movement would result in decals tearing. It wasn't one type of decal, it was the whole sheet.


As I didn't have spares, I persevered and was able to get all the tanks fully decaled. Often each of the decals were applied in 3 or 4 parts, carefully matched together as much as possible. Only a close inspection will reveal the tears. What should have taken about 30 minutes took 2 hours.

2 Pound armed command tank.

I have never had this happen before. I have torn decals due to rough handling but this was something else. After finishing up the first 5 tanks, I took a break, fully expecting to follow the same frustrating process but was very pleasantly surprised to find the 2nd decal sheet was fine. No tears at all. Perhaps the sheet in the first box sheet was just a dud!?


I could have contacted BF customer service and I have no doubt they would have sorted me a replacement. I have used their excellent service before. However I wanted to finish these for an upcoming tournament.

Cost:
These boxes retail on the FOW site for $45 US. The 2 boxes I picked up from bricks and mortar stores in Australia were $64 and $67 each. This equates to about $13 per tank. Considering this includes decals and cards, I think this is pretty good. Single tank blisters are $16 at the moment. The plastic boxes are certainly a better price point than the old resin and metal models.

Crusaders on the table ready for battle.
Conclusion:
These are fine models. BF have done well to provide a single box that can provide 4 different makes of Crusader. The box contains decals, commanders, turret pins, cards and instructions. There is nothing extra needed here to field these in the game. The models are well details and robust. I expect I will get lots of service out of these despite my clumsiness. On the negative, one of my decal sheets was bad. Overall, I am happy with this box and will put the decal sheet down to a bad batch.


I hope you enjoyed this article.


Saturday, 18 November 2017

Battlefront 8th Army 40mm Bofors

Back to the desert, this time for some AA guns.

As my Desert Rats force expands, it is time to add some anti-aircraft guns. What better way to do this then the ubiquitous Bofor. This will be my third unit of Bofors. I already have some USA ones and a unit of Late War British Bofors. I think the Bofors have always been one of the best AA units in FOW. In the new MW book, the AT has been upped to 7 and the ROF reduced to 3. Overall coupled with a save of 4+, these are a very versatile unit.


The Battlefront Blister - BR541 8th Army Bofors 40mm Gun contains 2 Bofors and a command stand. These blisters have been around for a while and are designed for version 3 and possibly version 2, where gun units had a command stand. I will just concentrate on the 2 guns themselves as I am painting them up for version 4. 


Battlefront have released a new box set which contains 3 Bofors, which is far more useful than the blister as three is the amount required for a minimum sized platoon. Looking at the BF store, the models in the new box are the same as the blister. The box also contains a unit card and has the new brown bases rather than the old grey ones. The new box is listed as US$37 and the blister US$22. So per gun, the blister (if you can still find one) is slightly cheaper. However if you need to buy 2 blisters, the box is cheaper and comes with the new V4 card.

Anyway, enough economics, onto the review.

Review:
Opening my blister, I found that all included parts were nicely cast and free of damage. Laying the pieces out though, I quickly found that I was missing 2 of the firing crew. There are 2 in the pack, not 4. I  fired off an email to Battlefront who responded quickly that they will provide a replacement. I have painted up what I have and will add the extras when they arrive.


Pieces of one gun less 1 crewman
Like all the old school metal guns, these models arrived with a little flash and a few mould lines. Nothing that 5 minutes with a hobby knife couldn't sort out. The Bofor assembly is not difficult but it is fiddly. The blister didn't come with instructions but there is a good one on the Battlefront website

These have always been nice models and Battlefront I think have been wise not to mess with the formula. I cannot imagine that enough would be sold to justify a plastic mould and the metal ones do the job nicely.

Assembly:
I started by laying down the feet that the gun would sit on. This is in three parts and the 2 short legs are connected with locating pins. The only important point here is make sure they are straight. I used the grid on my cutting board for this. I then glued the crew to the base. At this point, I applied some filler before the rest of the model was attached and it became more difficult. I used a spare plastic crew figure in place of one of the metal ones that came in the blister for increased variety.

Guns Assembled
Next I glued the base plate to rotating base. I had to splay the arms on the rotating base to get a good fit. I then glued on the gun and the tailpiece. Finally the sights were glued on. To finish the base, I pushed the ammo boxes into the wet putty. I left the firing crew off and will attach them after painting (and when the remainder arrive)

Painting Progress. Base coat and wash complete.

Painting:
I saw no reason to move away from my current British desert theme. You can find a description of that paint scheme and the steps I followed in my Battlefront V4 6 Pound Platoon Review.


Conclusion;
I really enjoyed working on this platoon. The models are well detailed and painted up well. I think the Bofors are a must have platoon for the MW Desert Rats. They provide one of the best AA umbrellas in the game and are very hand as low range anti-tank.


Roll Photos.


I hope you enjoyed this review.